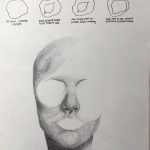
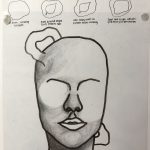
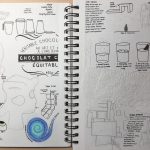
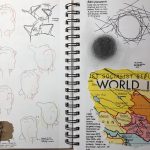
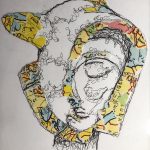

Above: the sketchbook pages outlining my ideas around plaster and the manipulation of the materials in a project where the concept was to have no concept.
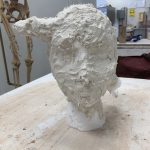
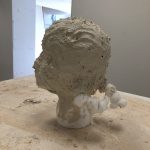
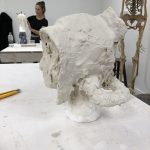
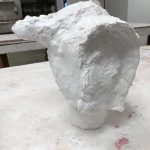
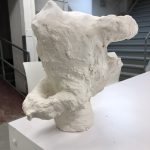
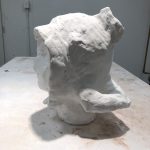
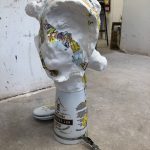
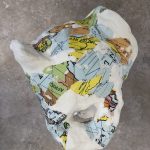
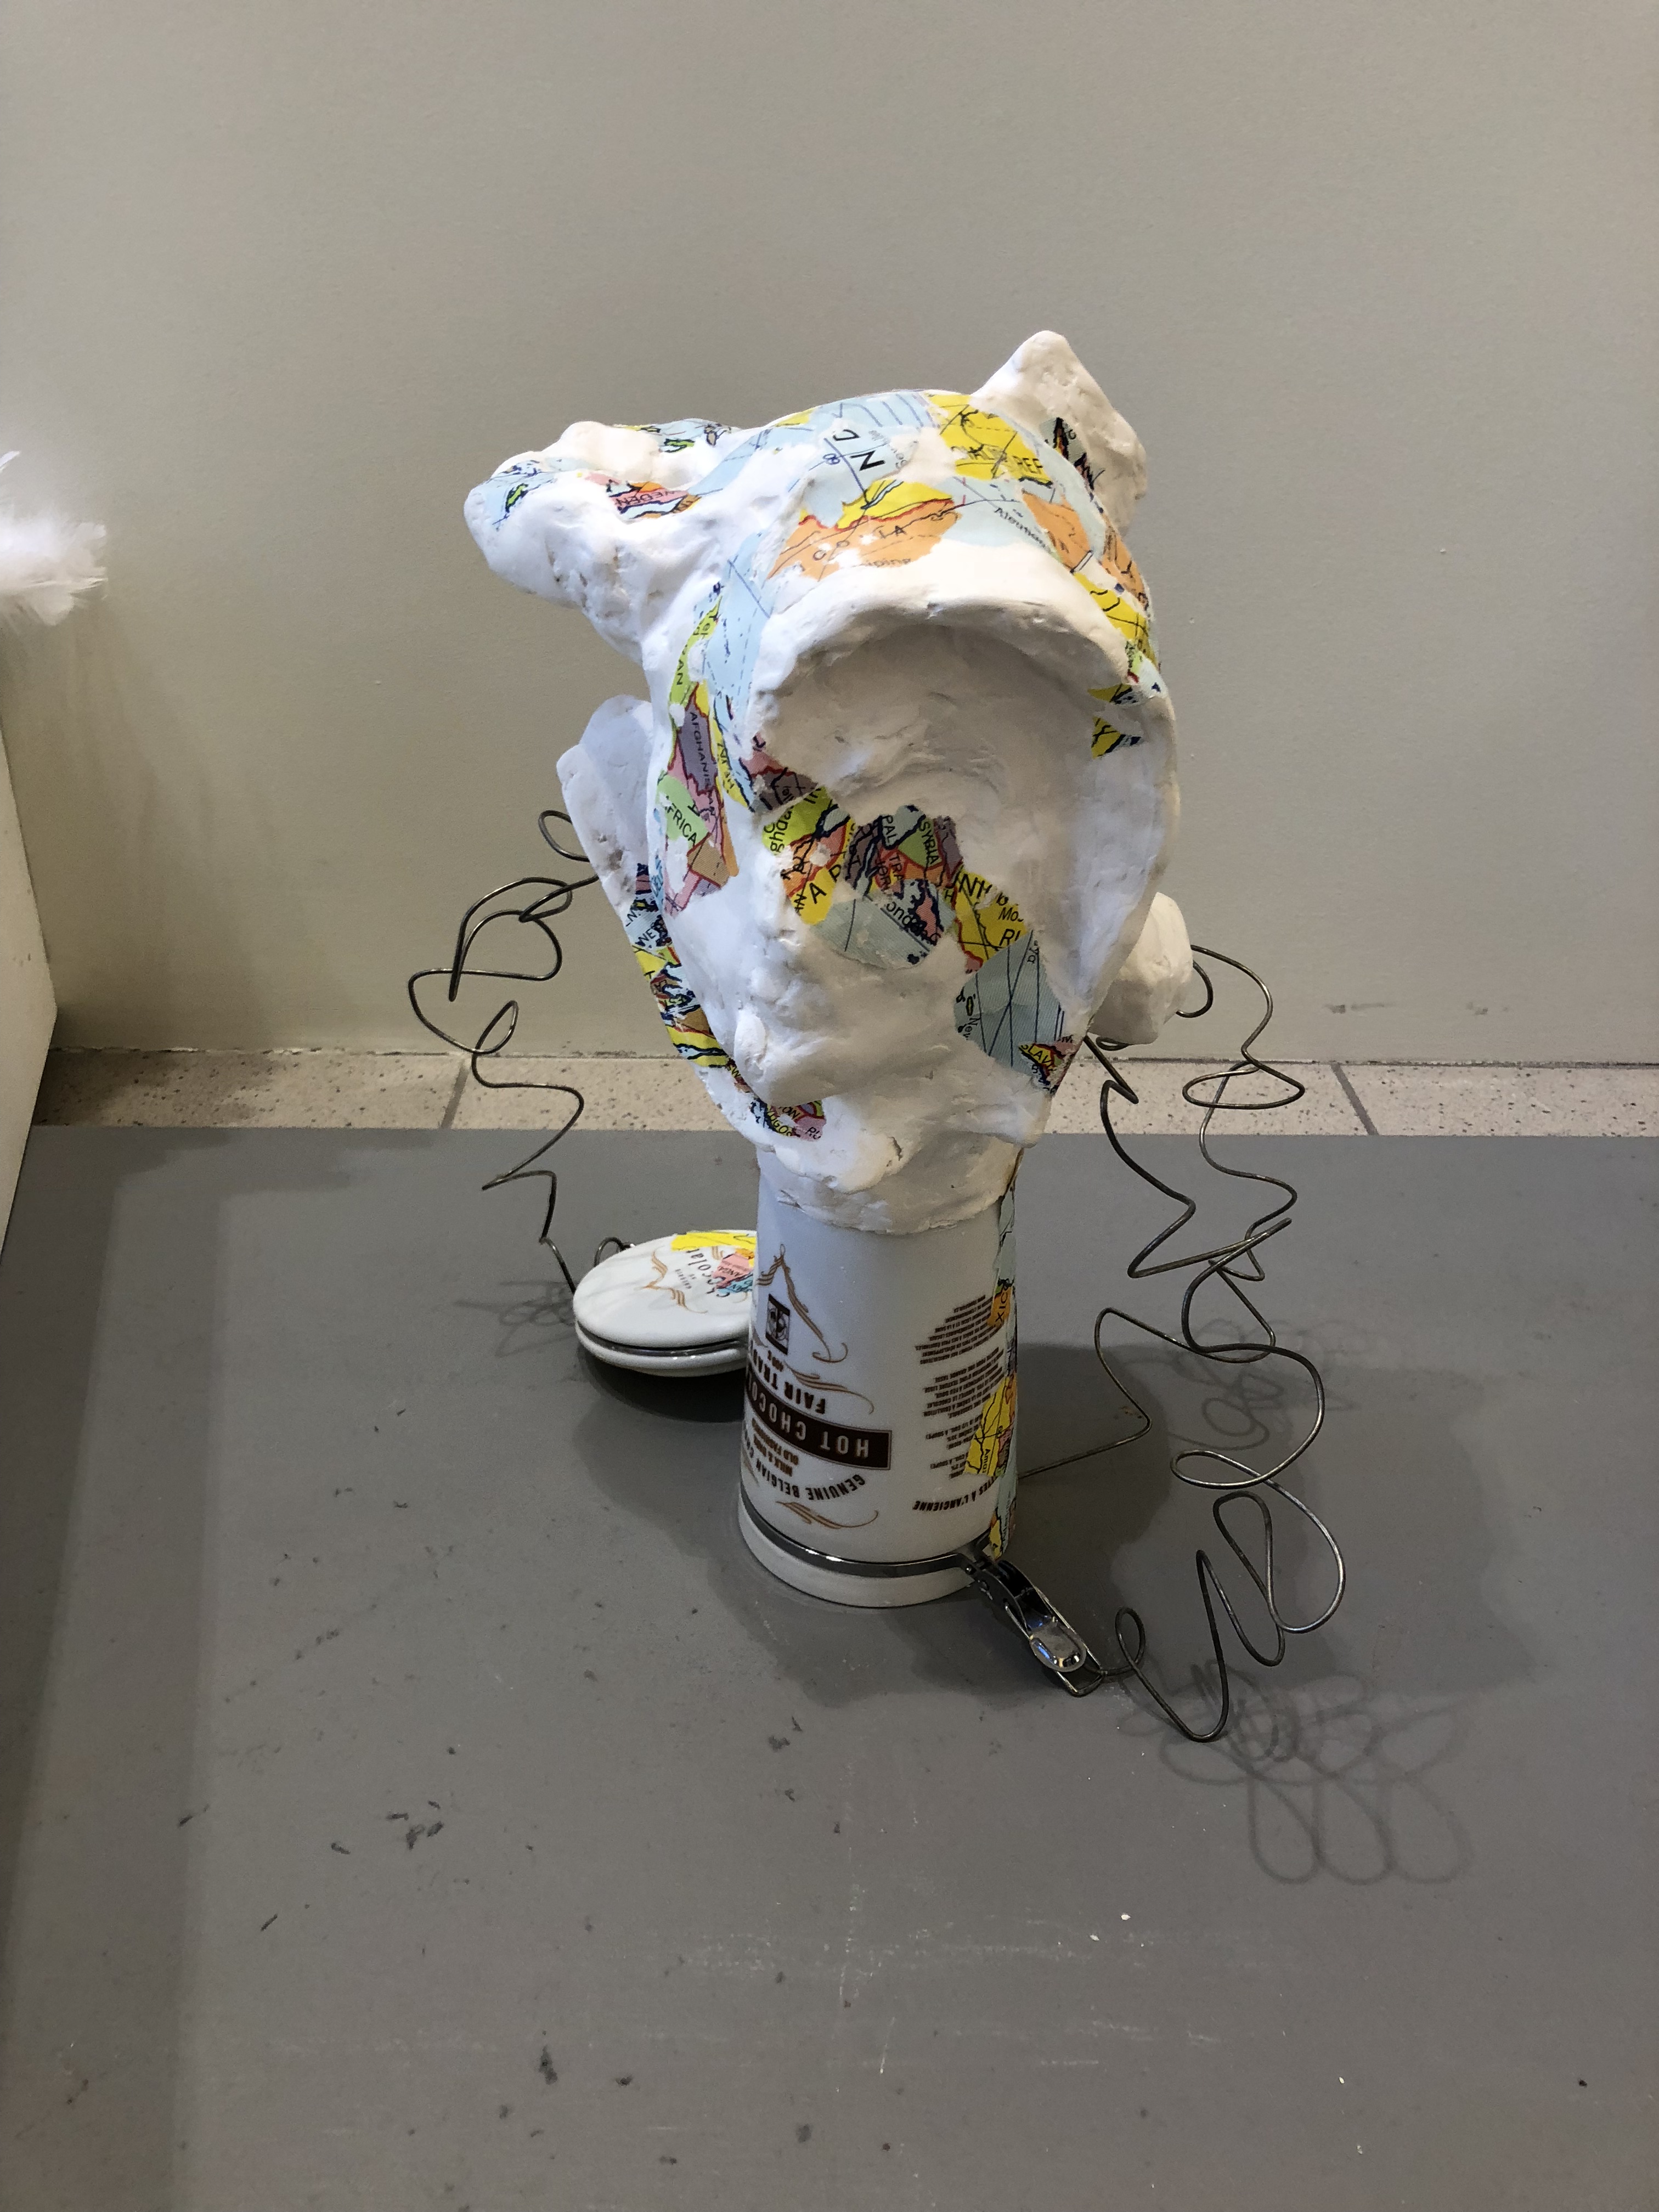
As the main element of the plaster assignment, we were each individually given a Styrofoam head to transform using plaster. We also had to include a base that we had found the week before, and it was a difficult challenge to bring these together in harmony. I did not have any preconceptions of what I wanted the head to look like. Many of the drawings I did for planning, were completed after the main areas of plaster were already on. Cheesecloth as well as plaster was used to stick the plaster to the Styrofoam.
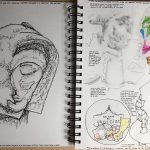
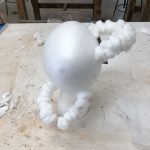
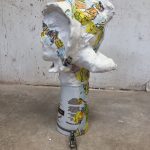
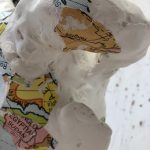
The first section completed was the hooped handles at the top and bottom of the head. I wanted to incorporate other materials from the get go, and building the handles with skewers and cotton wool balls allowed me to do so, and create a strong structure.
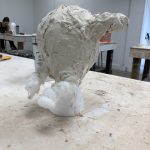
After adding these, I felt that something was missing, and I wanted to have more movement within the piece. I found some cardboard and started to rip it and bend it freely into shapes around the head. Once the first piece of cheesecloth was in the centre, holding the piece down, I then started to create the curvature from the centre of the face and around the left side.
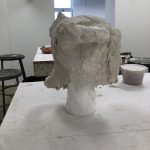
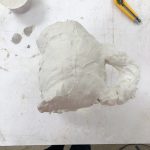
However, something was still missing, and I felt that the neck was too bland and a balance of plaster needed to be copied on the right side. I replicated the random positioning of cardboard from mid to bottom head. This came with a break between this piece of cardboard, and the existing piece already on the head. The break in the curve was welcome as it showed an unexpected turn of events.
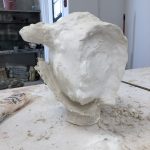

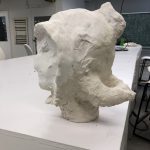
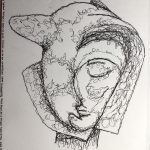
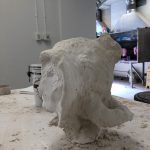
I was happy with the design of the head, and the movement that was created with each layer and addition of plaster. I decided to sand the head down in order to make it smooth, while still seeing the imperfections. Allowing the piece to continue to show the imperfections lets you view the rawness of the material.
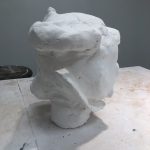

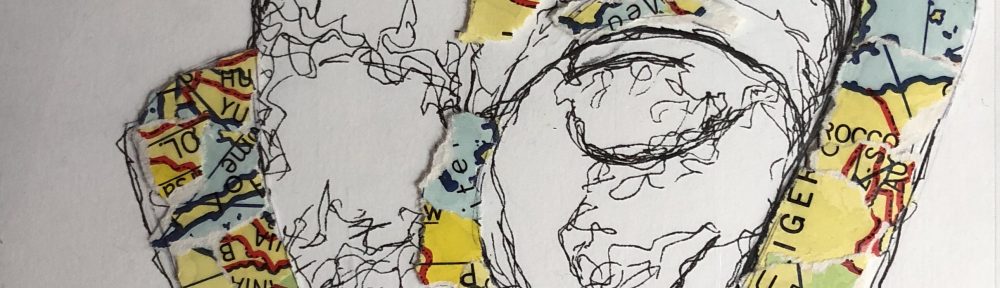
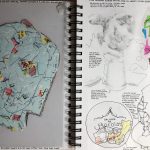
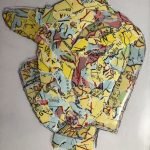
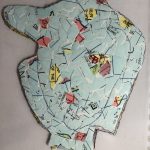
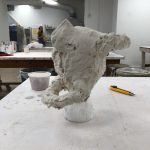
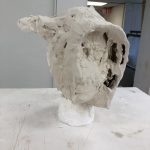
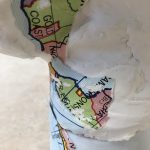
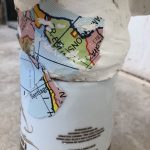
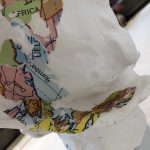
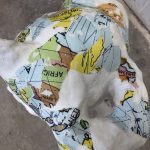
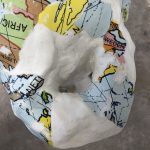
But once again, there was something missing, until I found three giant maps while routing around in the skips out the back. These were in very good condition and grabbed my attention immediately – I felt like I had to use them in some way or another with the plaster head.
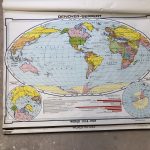
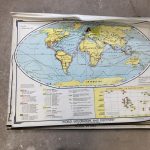
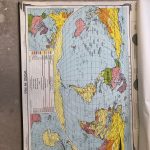
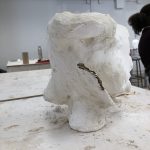
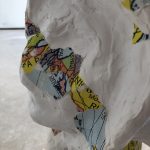
Then began the process of paper mache with the maps, to the head. I didn’t want large clumps of map to overwhelm the head, so I ripped the islands on the maps up into manageable sized chunks that allowed you to roughly see the country but not overwhelming you. The thick pieces of map had to be soaked in water first before applying to a dampened plaster with diluted white glue. I followed the ‘unnatural’ contours of the face that people may not see. This added an extra layer of movement.
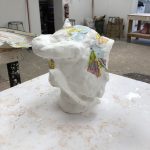

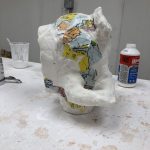
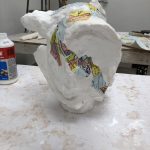
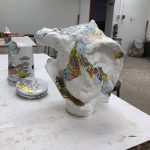
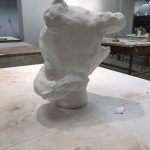
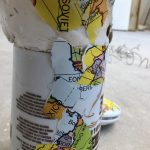
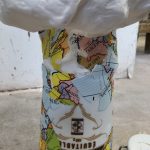
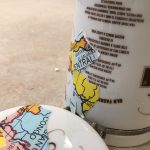
To finalise the design, I used sandpaper over the maps to rough them up and to bring plaster through some holes. This made the maps look like they were a part of the process of the head, rather than added at last minute. I also added maps to the side of my base, a ceramic chocolate pot. This connected the two together even further. The use of text within the piece fascinated me, as it is not often that you openly see text within a sculpture. There is a strange juxtaposition between the torn up maps of the world, showing chaos and destruction, and the calm and orderly chocolate pot.
The final addition were three curved wires from the bottom of the maps that mimicked the curvatures found in the head.
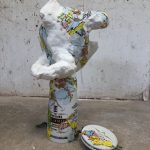
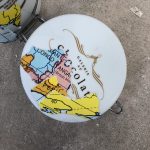
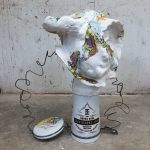
Overall, I was very pleased with the plaster head project. It allowed me to explore the use of plaster in a different environment, and stretched what I thought it was capable of doing. The balance of the piece, I believe to be successful, as the piece shows the delicacy of the world that we currently live in, while giving us some piece of mind with a hot chocolate.
Leave a Reply