After much consideration, and some playing around with Moonlight Dawn, creating a wide range of Moonlight Dawn Experiments, I decided to put all of these elements into one video. I adapted the script from Moonlight Dawn, cutting out parts that I wasn’t sure about when I initially wrote it, allowing myself to quickly create a final Script. This version was only three minutes long, compared to my initial Red Angel Chinese Opera, which was over seven minutes. I also kept the elements of the hair and the mask the same, as these were still portraying the character that I wanted.
I kept with the same music and video clips also as I found it very difficult to not only find other appropriate clips, but also to add them into the video. These clips were suitable to the story and the video itself.
I felt more nervous to perform than usual, and I feel that this may have effected the final piece. Arm movements were not as exaggerated as usual, which did portray some kind of shyness to the camera. I do, however, like the final video as the story and clips fit in well with each other. The sources for which I have used also fit in well with my own story line.
Moonlight Dawn
The final edit of the film was made with music from Traditional Chinese Music, taken off of YouTube, mixed with my own Script, adapted from several traditional Chinese operas and music including; The Old Man in the Moonlight and Zui Lang Man De Shi – The Most Romantic Thing. The mask was used from the last film, Red Angel Chinese Opera, as I felt that these characters were very similar in their experiences of romance.
I found that I was happier with this final edit compared to the final edit of Red Angel, as this version was more Chinese orientated. This was due to the change in the hair style and the added extra of the Chinese music at intervals. I am, however, still slightly unsure of the video due to personal confidence of acting and work, and also the direction of which this could take until comments are made upon the work.
Comments on this piece included that it was still too long. People knew the classic love story, and were quickly finding it boring, and thus I decided on a three minute limit to my next piece. This keeps the story short and sweet, while also being able to add the necessary elements of the opera, without it being an overdose. I also wanted to add in more Chinese music in order to see the cultural effect that it has. Layering on top of this, I would also want to add in black and white clips of Chinese operas, in order to create a clearer link between my own piece and the opera scene. Lastly, I would like to try out the green screen in order to see if I am able to add this into my work, or whether this makes it more difficult to work with.
Red Angel Chinese Opera
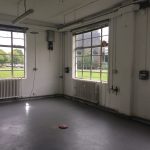
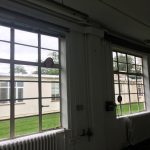
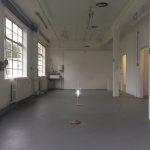
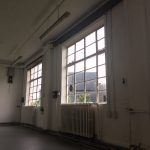
I initially planned for my piece to be showing in one of the white rooms of the studios. My mind was quickly changed when I found that the image came up very clear in one of the dark rooms. The projector and speakers were then set up in here for people to view. I originally wanted to display the masks along with the video, however I felt that I could not find an appropriate space for this, and the audience can capture the meaning and beauty in the film.
Editing the video was very quick as the interpretive actions were done in time to the speech. This allowed me to understand the use of getting it right first time during filming, rather than pieces many parts together.
I decided on the name Red Angel as these are some of the most common words in the opera. It is also because red defines bravery, loyalty, positivity and prosperity in a character. The angel part is because they are divine creatures, much like the female character within the story.
Overall, I was happy to research Chinese opera, and I have found it very interesting, and that I would consider other ‘non-Western’ routes for my artwork. However, I also felt as though I did not enjoy this as much as I did with the other films I have done, and also found it very awkward at all points of editing and producing.
Below is the final edit of Red Angel, which can also be found on YouTube.
When showing this to the studio group, many of them enjoyed the speech, especially as this was only myself doing both parts. There were also many comments about how it was clear which character was speaking, even though it was only one voice. Someone did find this too long, and I would agree with this and I feel as though 6 minutes would be long enough. To improve upon this, I have been given the idea of making, or finding more traditional costumes, finding other people to perform (as I didn’t like the project primarily because of this factor), and making it shorter. Another way to present it would be to have it on a larger screen, like in the cinema, while having it on the loop with seats all around, allowing people to come in and out. A last way to present this is having a live performance – having two or three people do live acting while I speak into a microphone.I found these ideas really constructive and hope to get others involved in this project, which would be very fun.
Untitled [Singing Film]

My final edit of the film Untitled [Singing Film] was uploaded on YouTube, in order for not only easy access, but also as this is a useful platform to use for the artwork, and for the message of mine to come across. The piece was displayed by projector in a bit of a mess of wires – this was not the intended effect, as I would wish to have the projector and wires behind the wall, out of sight to the viewers of the piece. I also did not have the chance to warn people that they must take part in the film by singing along to at least one song, also making a different atmosphere to the piece altogether. I did, however, enjoy the uncomfortable atmosphere that was created when the piece was shown to the studio group, as this was unexpected. It is an aspect that I wish to continue through my work as this is an aspect I did not know that I could control with my art practice.

Don’t Look At Me Exhibition
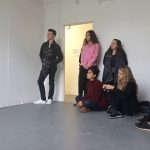
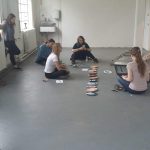
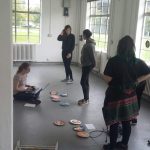
At ten o’clock this morning, we were gathered as a studio group and instructed to set up an exhibition by 12:30 with all of the portraits that we previously hung around the department.
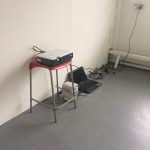
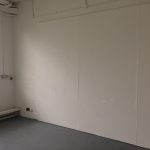
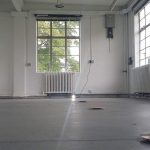
The space that we used initially had to be cleared as it was full of tables, chairs and work from other studio groups. The floor was swept and we were informed of our brief: set up an exhibition of our portraits using exhibition inspiration from artists such as Wolfgang Tillmans. We were not to put all the self-portraits along the wall in the same manner and at the same height. A press release also needed to be made.
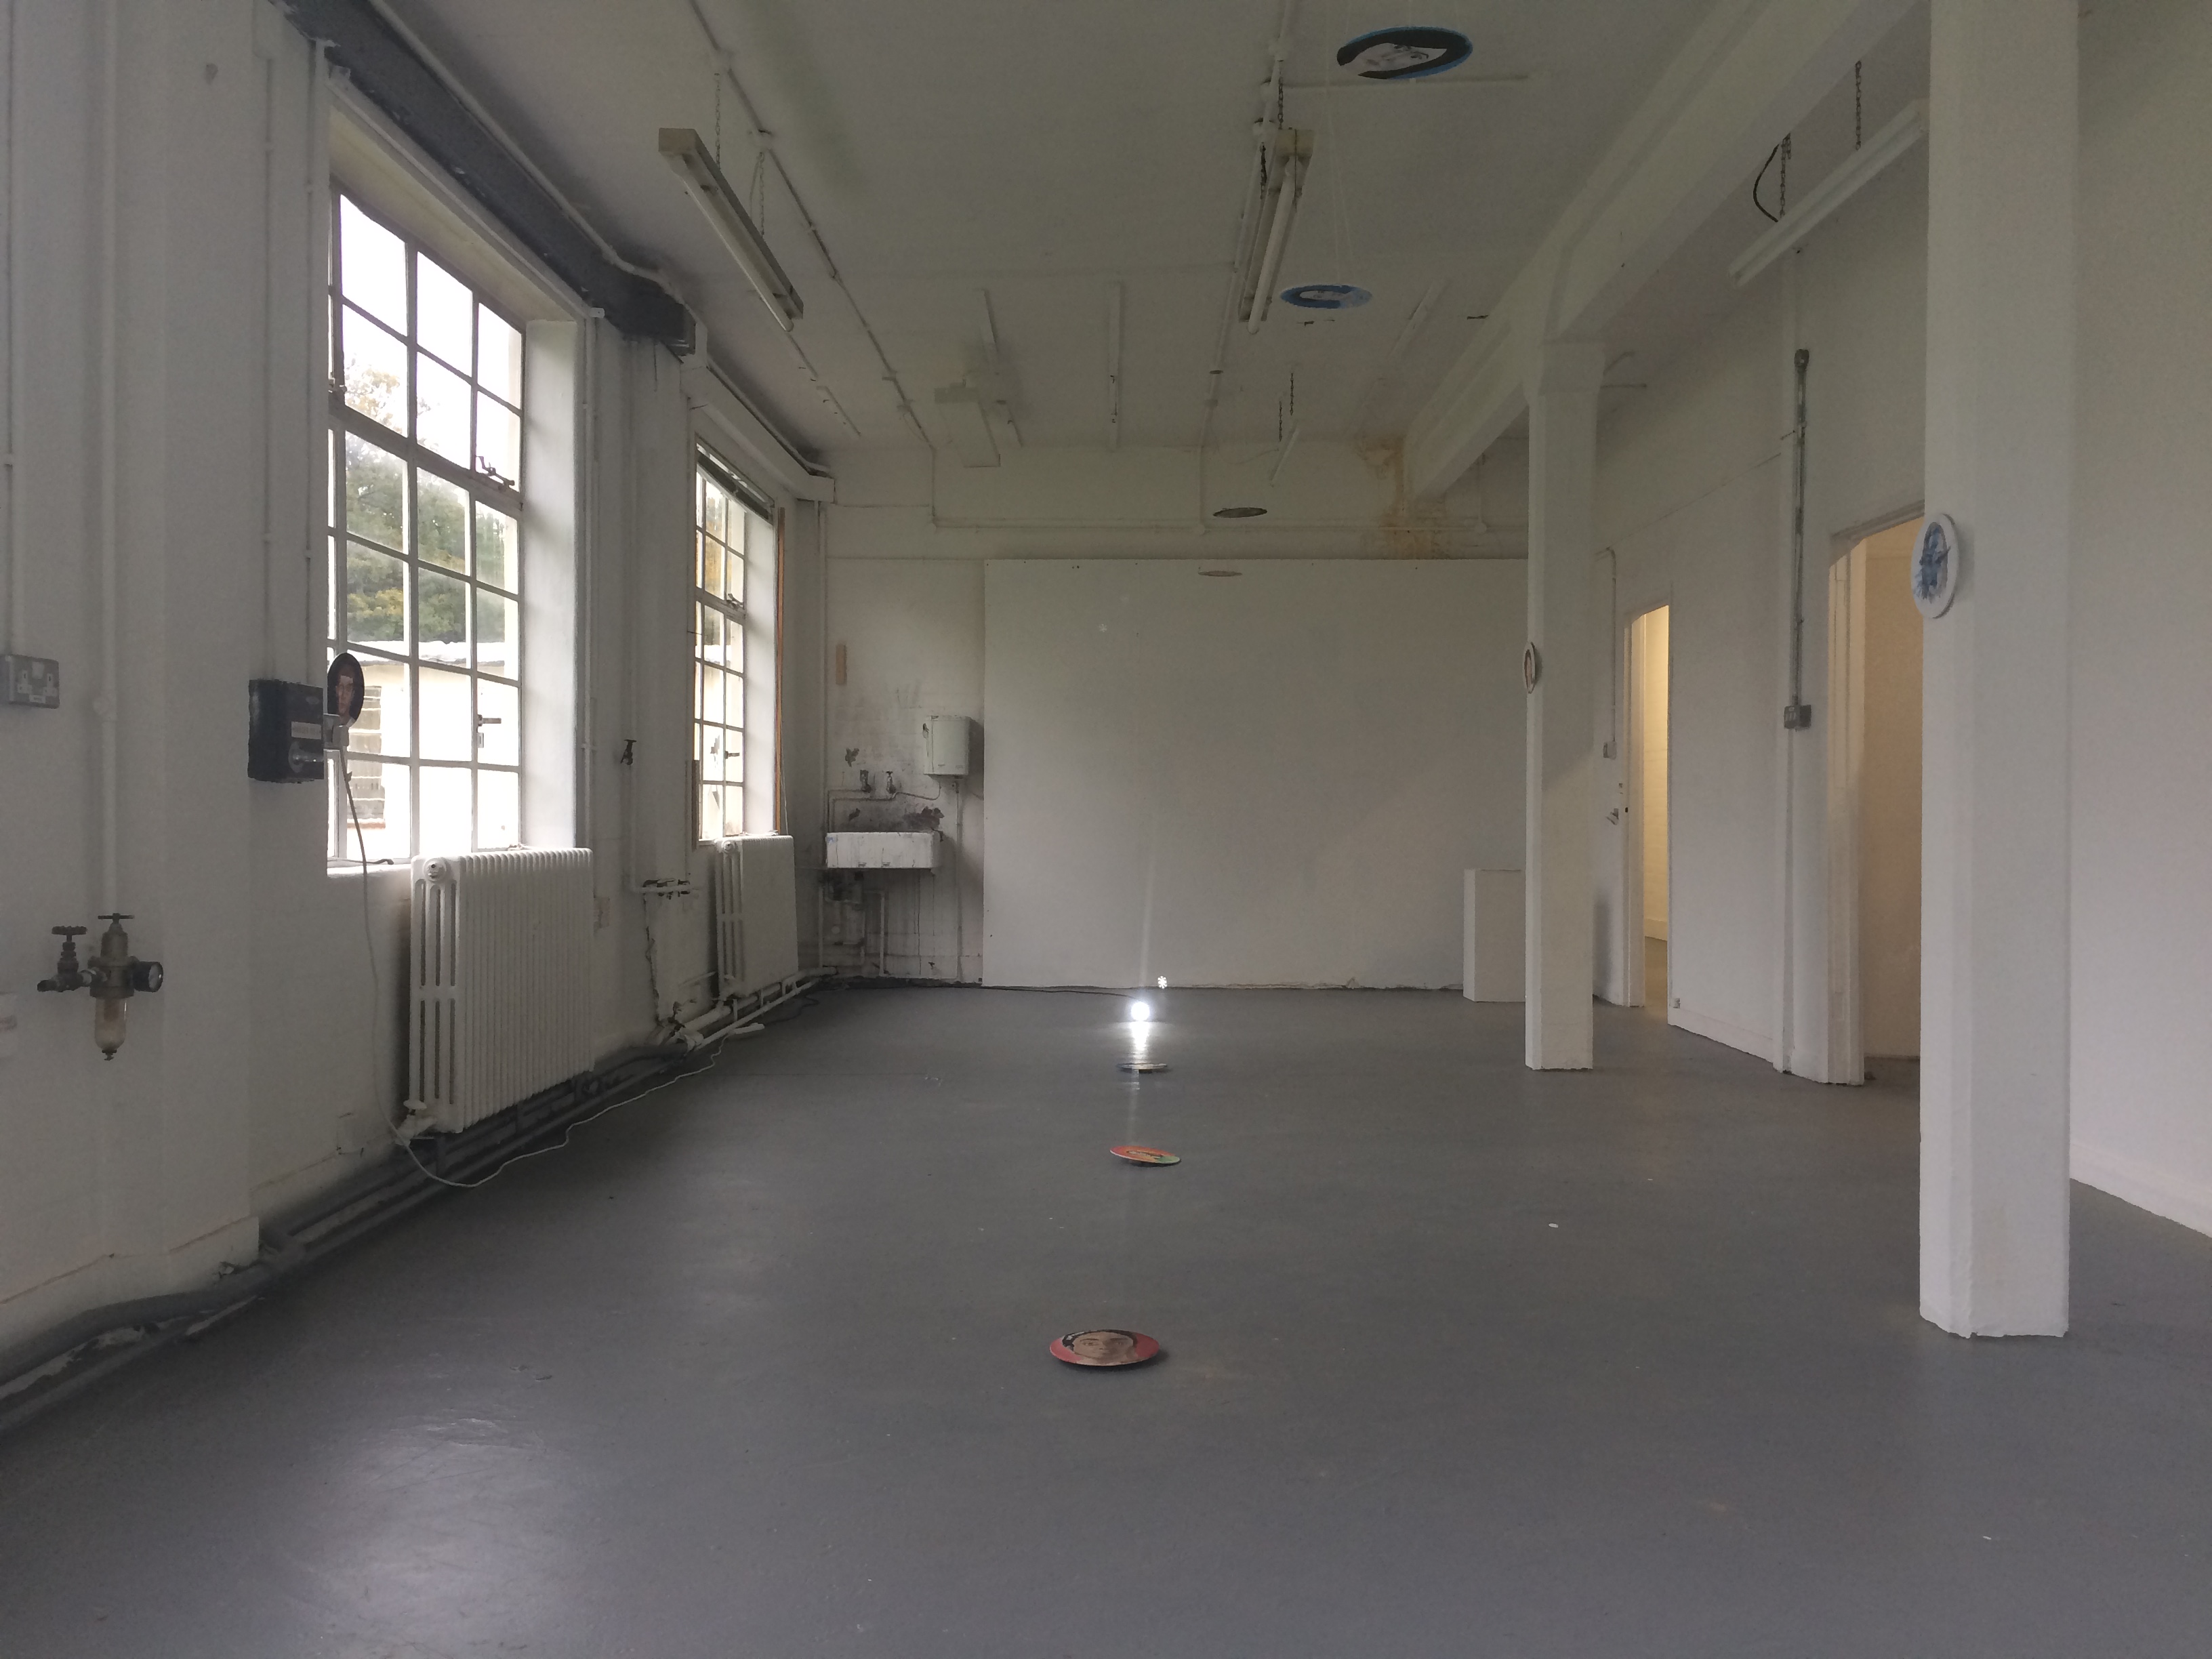
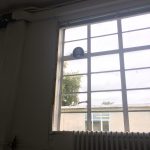
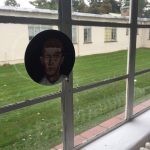
We lined up all of the portraits and found that common theme was the use of backgrounds. There was four categories of background: black, white, blue and ‘other’ colours. This made the planning of the exhibition easier: the black portraits were quickly hung on the windows and the white portraits on the pillars in the room, as though these opposing colours were looking at each other.
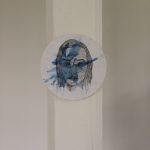
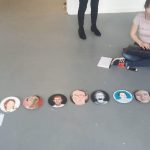
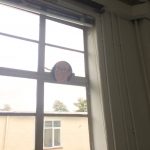
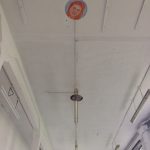
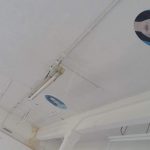
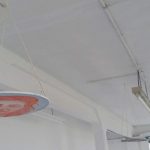
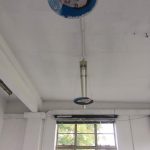
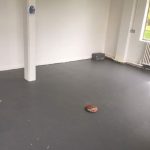
A suggestion of hanging some of the portraits from the ceiling was soon raised by myself. The hangings from the ceiling would make the exhibition more interactive as you would have to walk between them and look up in order to fully appreciate the piece. Everyone helped to put the four portraits with the blue background up at varying heights using sting.
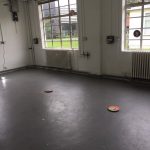
The last three pieces, with the coloured backgrounds (excluding blue) were then placed at equal intervals on the floor. Once again, visitors to the exhibition would have to walk around, and look around, in order to view these portraits.
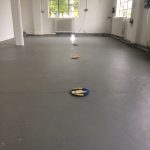
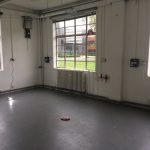
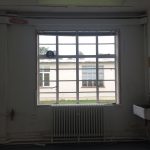
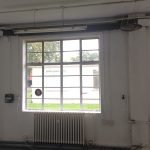
Lights were added in this process along the floor. It was thought that we should black out the windows, however many in the group were confused at this prospect – not only would we of had to have used bin bags to black out the windows which would have looked tacky, the room was also chosen for its natural light. As a group, we therefore decided to stick with natural light in the room. As it got darker, however, the two small spotlights on the floor began to seep into the space, illuminating the floor. When it was brighter outside, however, the spotlights were not as effective and almost pointless. I did find that they did reflect on the shiny surface of the floor and this created a river of work when stood at the right angle.
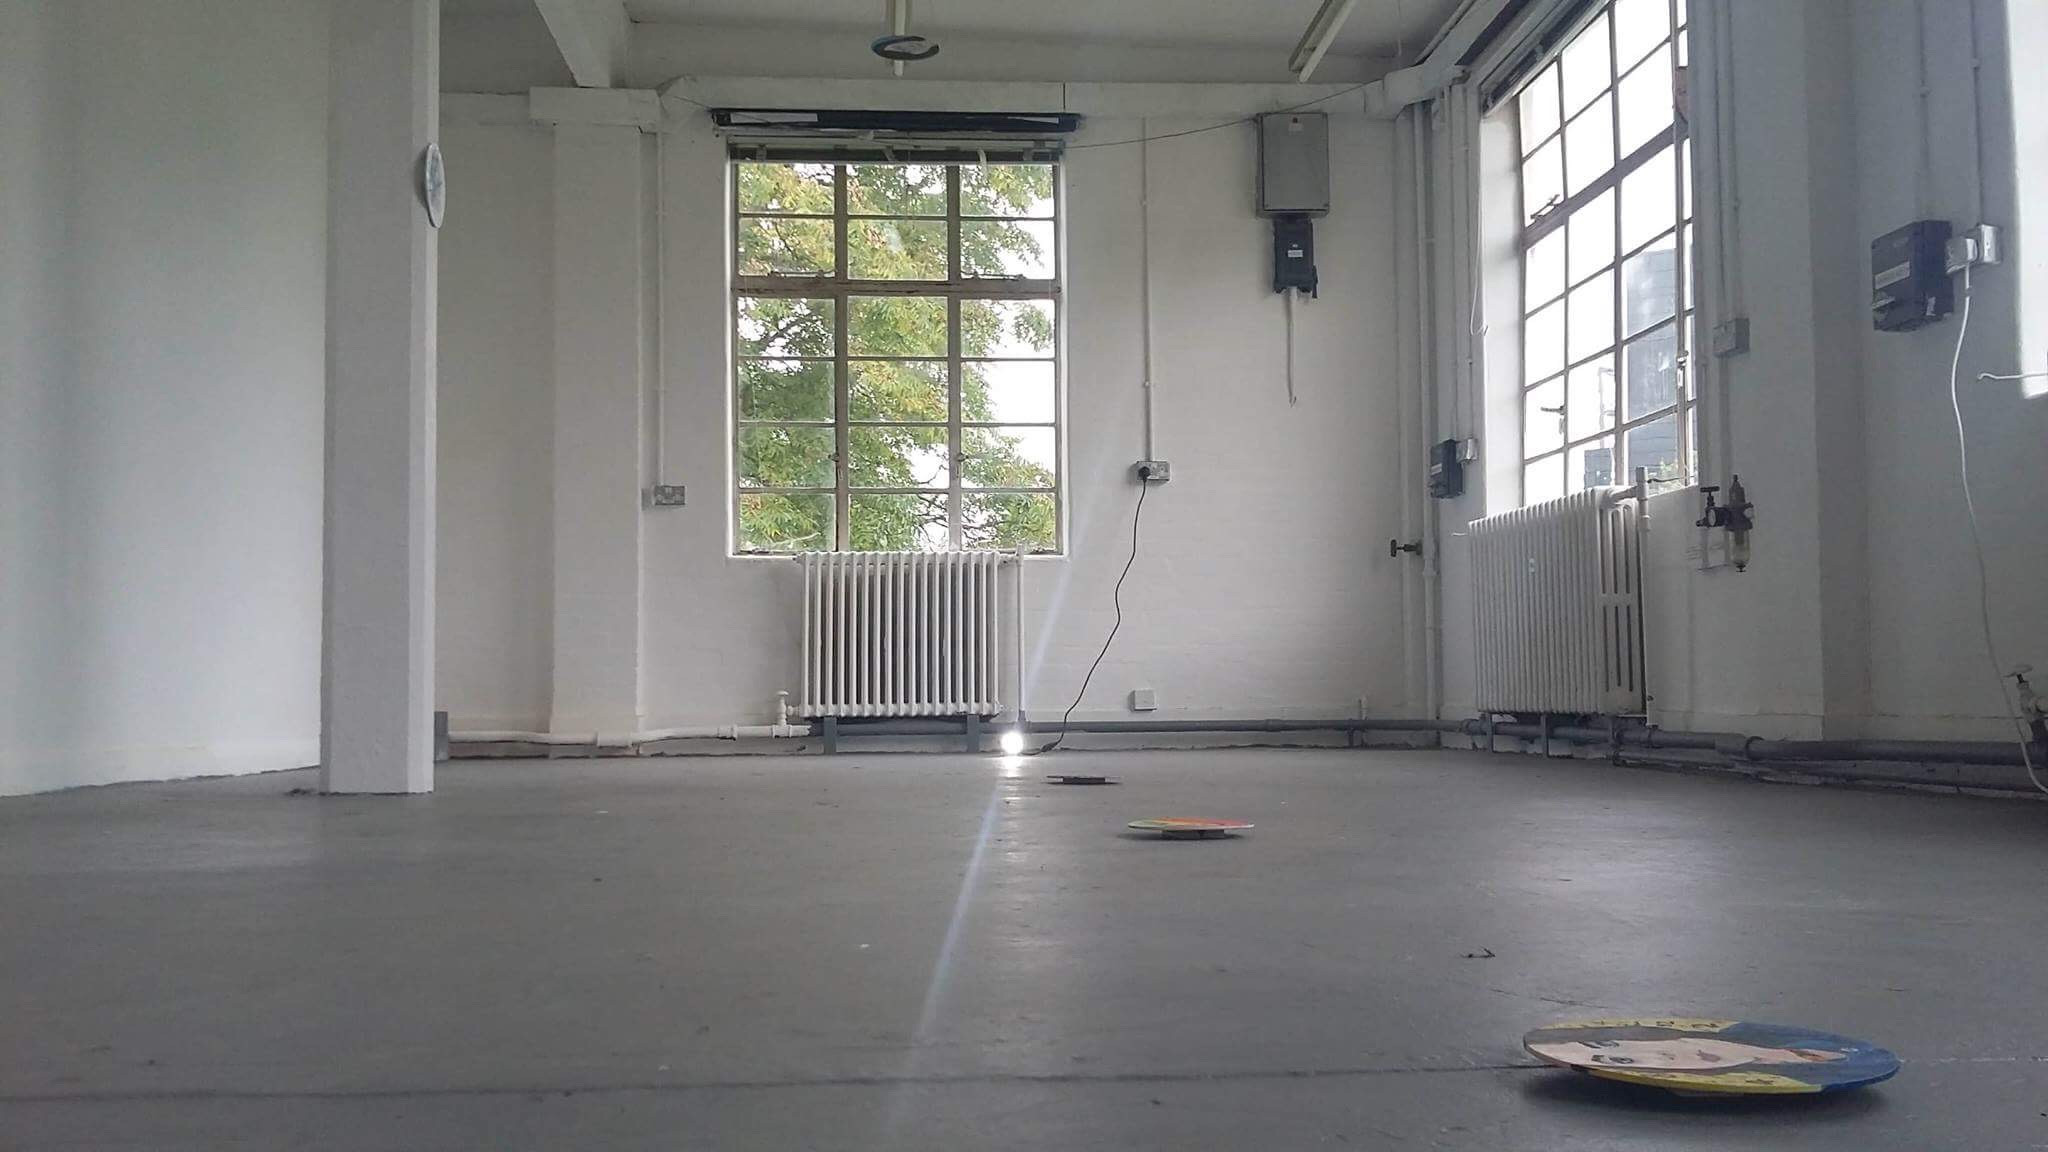
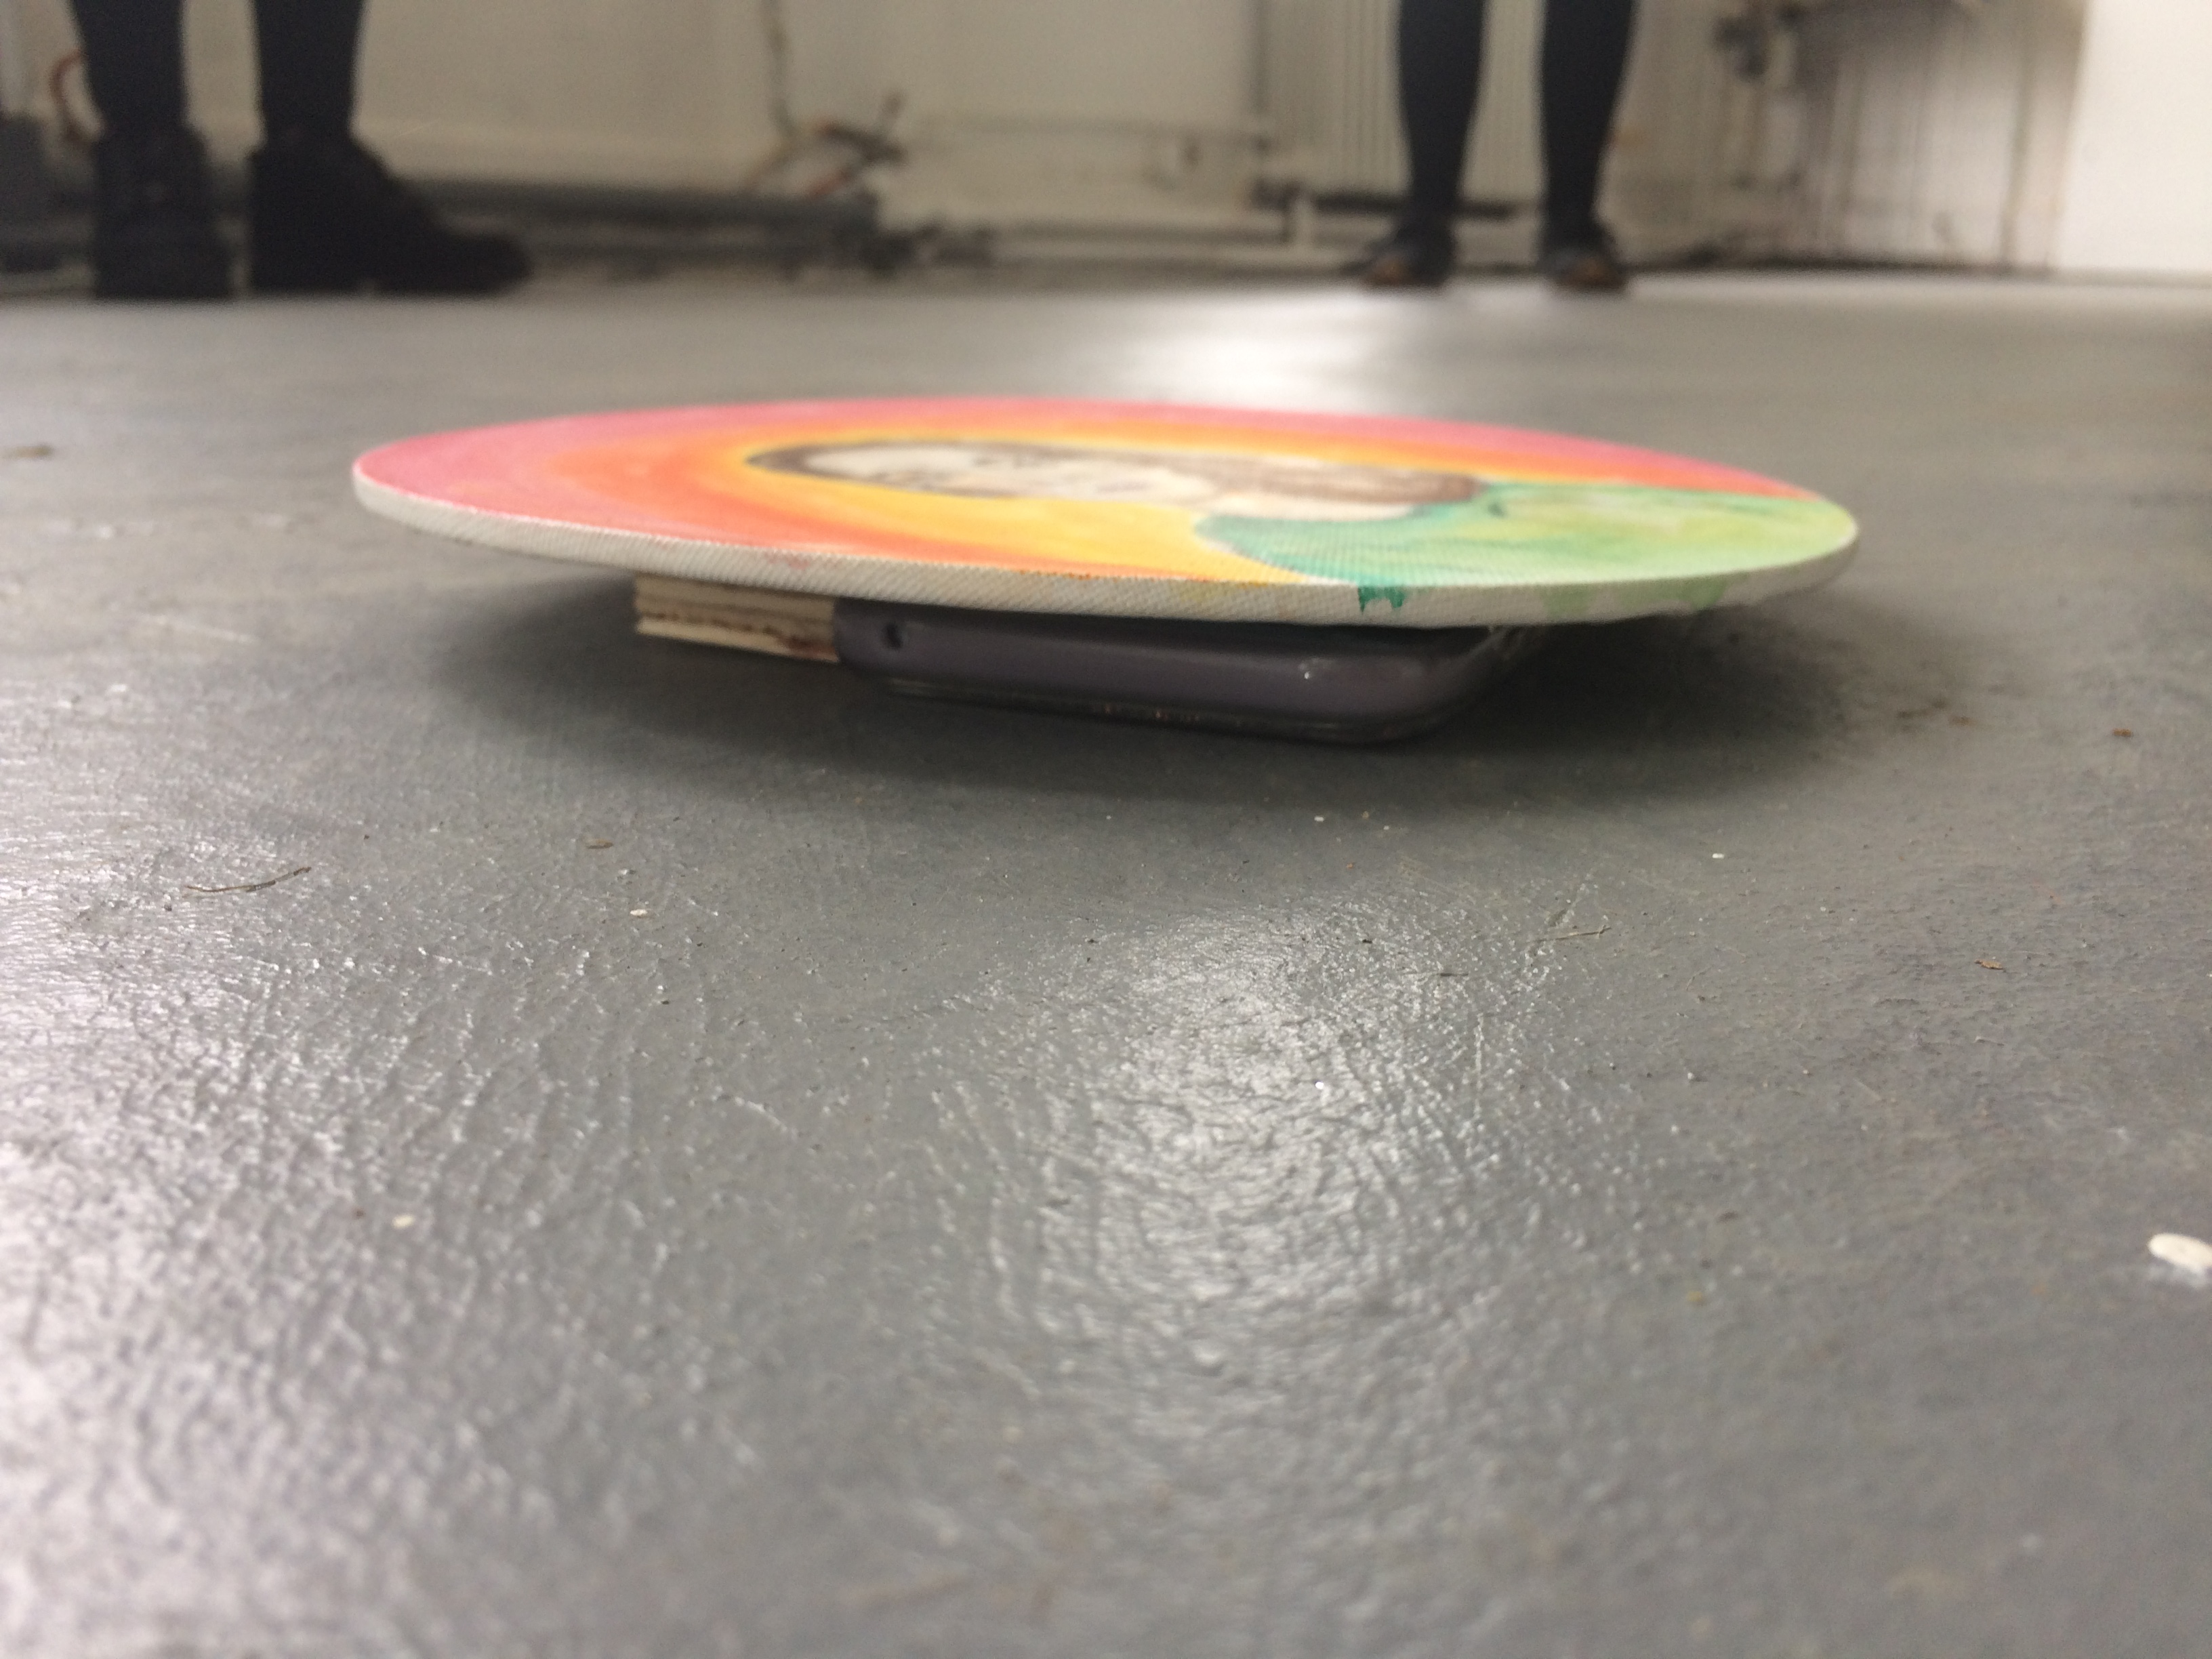
A suggestion was also made of using the TV screen that was next door in order to play the videos that we made of us talking about our videos. I piped up and said that I didn’t really want to see my own face replicated three times in one room, and for everyone else to see me four times! I proposed that we used the voices instead of a video. A voice recording was then made of each person talking about their self-portraits from the Facebook videos. This was then placed under one of the pieces on the floor, making it discrete, loud and central to the room. Other places, the phone would have been seen, or it would have been in the corner of a room.
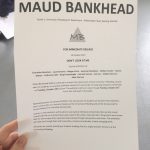
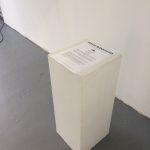
A press release was also crucial to the exhibition. As this was the first press release that I have written, I enlisted some help from the Athen B Gallery, Wild Art on Virgin Walls, Tom Ford and The Practical Art World. These were all used collectively in order to write a complete and concise press release containing the details of the gallery, the artists, exhibition dates, and information about the exhibition. The final Press Release is available online. We came to a group decision on the name of the exhibition as ‘Don’t Look at Me’.
I enjoyed curating the exhibition with the other students, especially being able to bounce ideas off of one another about different elements, and the quick pace of getting ready. I found the final outcome of the interactiveness of the exhibition very powerful too, as it invited you to travel down the portraits and look up and down, in order to view all of them. I did, however, find that my portrait was a little swamped with light from the window behind, and thus could not take an effective photograph of it displayed. It did work effectively hung, looking down at people, as sometimes I catch myself doing this – another secret revealed.

Plaster Workshop
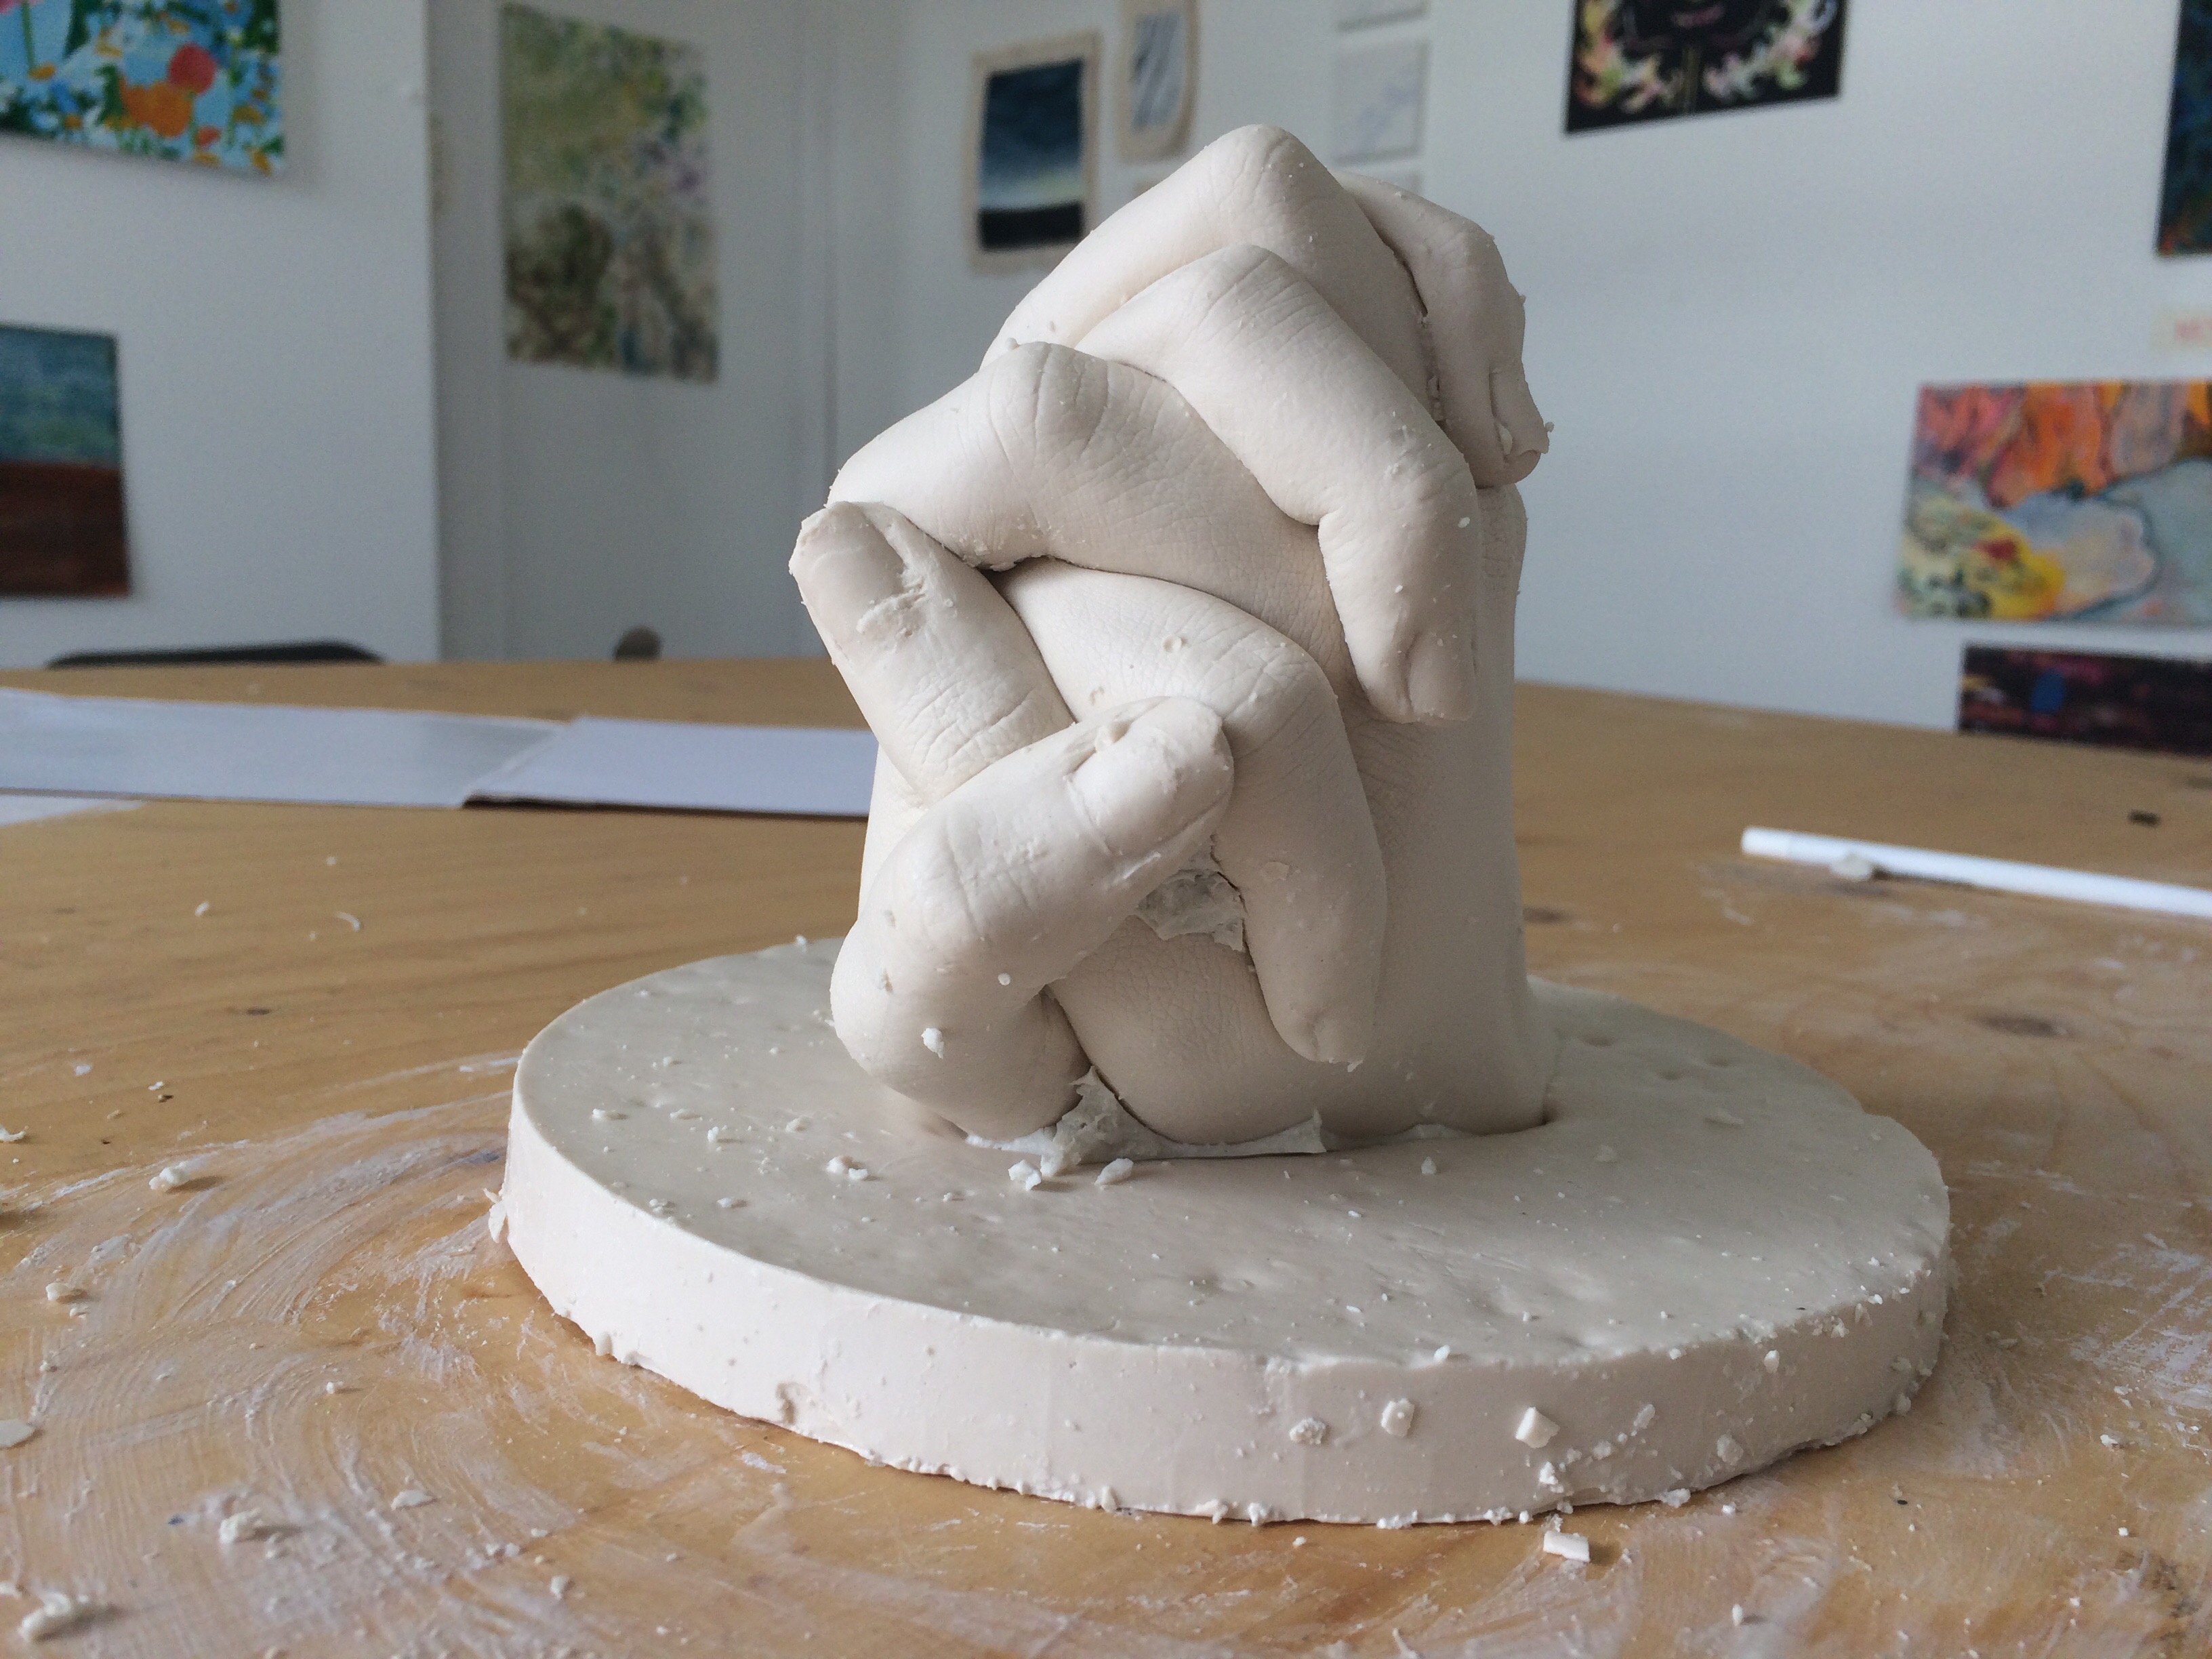
The Plaster workshop taught me how to cast a mould of my hands.
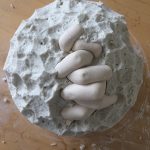
Initially, we had to ensure the bowls and/or buckets that we were using were clean so then there was no contamination with lumps and unwanted materials. The powder that we used for the casting had to be mixed 1 part powder to 3 parts water. With a 900 gram bag, we needed to use 2.7 litres of water. To make this process easier, we worked in groups, meaning a group of 3 needed 8.1 litres of water. Once the water was ready, we also needed to be ready with the bowls we were going to cast in as it would start settling quickly. When we are all ready, all the powder was added to the water and mixed thoroughly for 30 seconds, and poured onto our hands (and some, their feet).
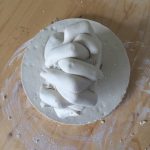
It was then a waiting game as we needed to ensure that the mould had set before we moved. Due to the position I had put my hands in, I found it very difficult to then lift my hands out, therefore taking a few minutes. I was very impressed with the level of detail the mould showed – everything down to the grains of the skin.
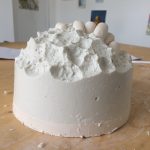
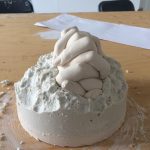
To make the plaster, we filled a bowl of water between a 1/3 and 1/2 mark. Sifting the plaster powder (which felt like heavy flour, or cornflour) through our fingers allowed large lumps to be broken up before it sunk into the water. We continued this process with handfuls of flour until small islands in the water were not disappearing. The plaster was then mixed my hand to ensure there was no lumps and a smooth consistency was achieved.
When pouring the plaster into the mould, we did it bit by bit. This was so then we could swirl the plaster around the mould, trying to cover all nooks and crannies that could be hidden in the cast. This process was repeated until either we had filled the mould level with the top, or added a base. This was then left to dry for 24-48 hours.
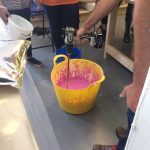

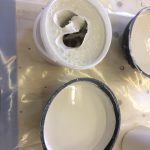
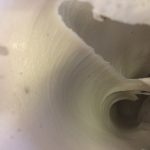
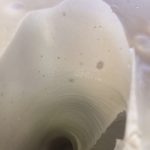
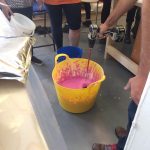
Above: Photographs of part of the process to make the mould.
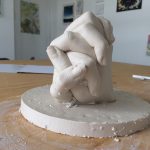


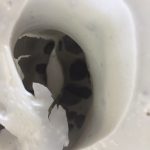
 Above: Photographs taken during the process of taking the mould off, revealing the hands. I was very impressed of how detailed each finger was, down the the creases of the skin. I do need to go back and take out all the little bits of mould and dust it off.
Self-Portrait
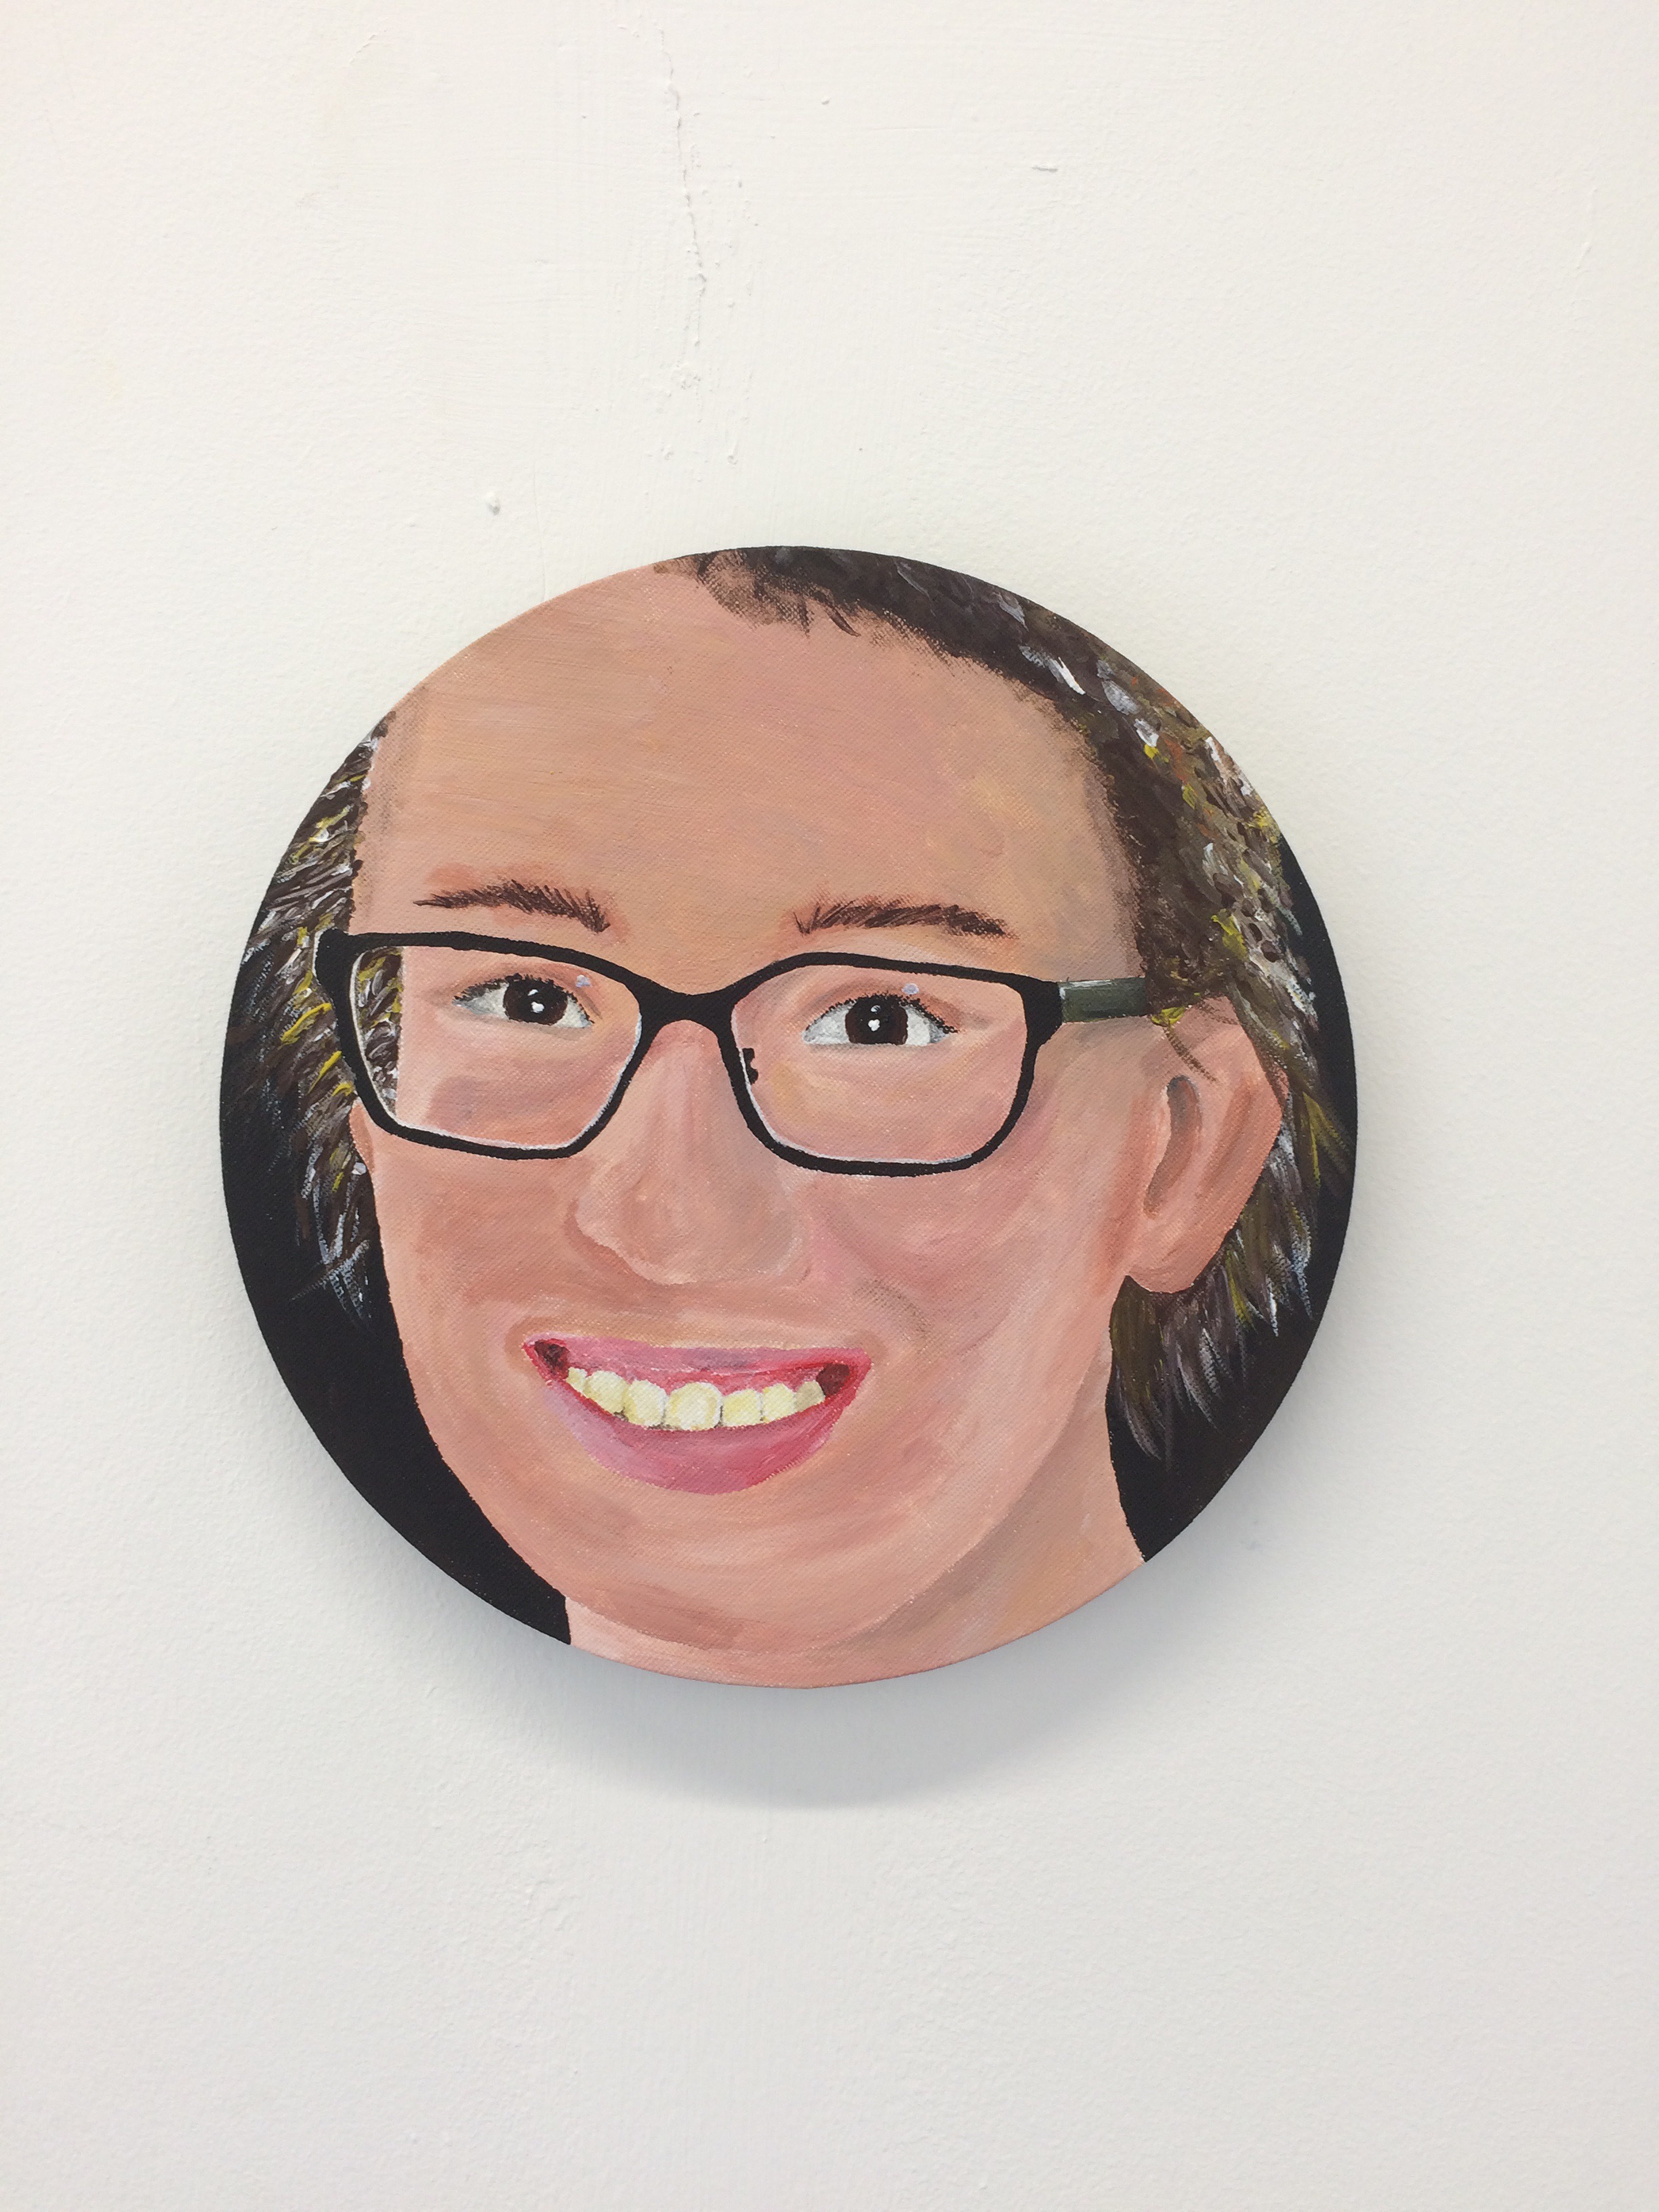
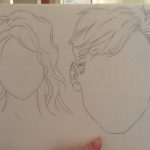
Immediately in second year and a small project has begun. We have been asked to draw, paint, sketch and produce a photorealistic self portrait on a small round piece of canvas board. This self portrait has to show something that no one knows about us in the art department, and took a video with a small explanation of what this was. After looking through many photos from since I was a child and my fears and thoughts no one knew, I decided upon my fear of failure. We then left these at eye level around the second year studio.
Something many people don’t know about me is that I am afraid of failure and afraid of dropping below expectations, especially my own. This happened to me in my GCSE’s – my school, I believe my family and friends, and I, expected majority A and A* grades. I ended up getting three A*’s, two A’s and the rest B’s after getting many papers remarked. I was incredibly disappointed with my overall grades. From here, I knew I could never fail myself like that again, so much so, it has become a large fear of mine, and hence why I push myself again and again and again. Since my GCSE’s, and especially my Art GCSE, I have not been disappointed by the rewards and results, even though it will always be something very much at the forefront of my mind.
I chose to paint this piece as I have never painted a portrait before. I also feel more comfortable using pencil so this was very much stepping outside of my comfort zone. I was shocked and surprised at how difficult it was to create the correct skin tones and expression using a paint brush rather than a pencil. Although I am proud of the final painting, there is still a small part of me that believes I have failed painting my own portrait.

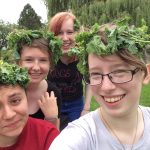

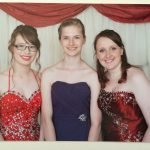
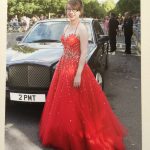
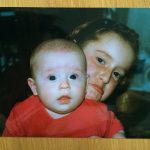
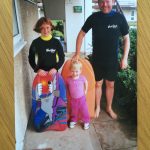
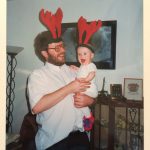

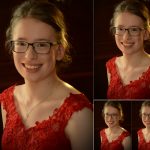


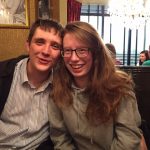

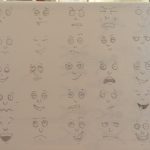
Above: An assortment of photographs of me showing different moods, facial expressions and compositions in the photographs. These helped me to paint my self portrait.
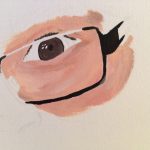
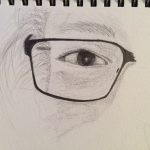
Above: testers on whether I was comfortable painting or drawing my portrait. I decided to paint it as I had never painted a realistic portrait before and I wanted to set myself the challenge. I was inspired by the hyperrealistic paintings of Joongwon Charles Jeong and the perfection of the imperfections.
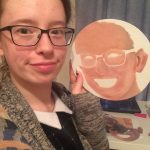
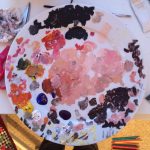
Above: comparing my face half way through the painting process and the palette I ended up with. I was shocked about how many different tones and shades that had to be used in order to recreate the photograph as a painting.
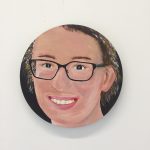
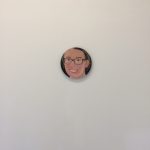
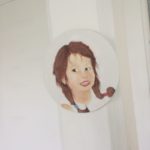
Above: final painting displayed in the corridor of the second year space. I decided to use two pieces of wood to display the piece on the wall. Although this makes the painting stick out from the wall, it ensures that no nails, string or bluetac can be seen, keeping the mechanism discrete. I also put it in a part of the corridor that not many people go down as although I am proud of the piece, I still have the feeling that I have failed painting my own portrait.
Update: Tuesday, 10 October
The corridor started to get used as a storage space, and this made my piece look like it was just hung up to show it, just as I would have done in school. It transformed the space into something that looked very unprofessional and dirty. The piece was then moved to form an exhibition.
Sculpture: A Conclusion
Overall, I have found this an incredibly fun, and also a slightly enduring project, right from the beginning, to the very last moment of walking away from the finished sculpture. I found the project brief making me think about sculpture, and artwork in general, in a new way, and found that I was stretching my boundaries in my ideas and concepts.
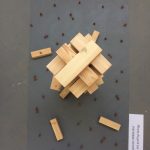
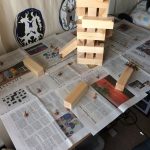
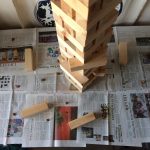
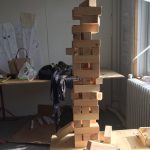
Choosing the design of the piece was challenging as I wanted to explore this project in so many different ways, and with more time and resources, I would have. I decided upon the Jenga tower and little people above all the other designs, as I felt this would have stretched my boundaries more, and I would have been happier with this design above the others. Through mixing with clay, paper and wire, I designed and made all the miniature figures, each with individualised poses and personalities. I decided after a few failed experiments that wire, wire and paper, or wire and clay, were not the best combinations to create the miniature people with. Choosing clay and continuing with it, was I believe, one of the toughest parts of the sculpture. This is because the figures are so small and fine, and clay can be damaged very easily (unfortunately, not every clay figure made it to the very end). It is also because clay was occasionally very difficult to work with, and I sometimes did want to give up on it. However, I stuck to my guns, because I knew how difficult any other methods of making the figures were.
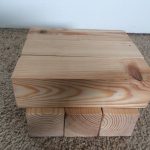
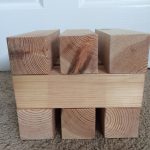
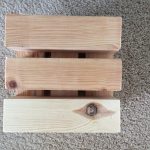
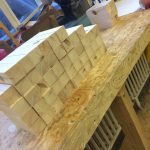
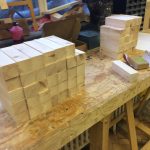
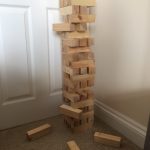
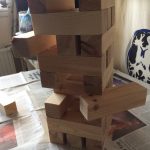
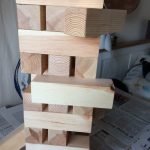
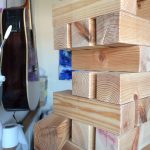
The bricks, on the other hand, were very, very easy to make (lift a saw up and down a few times and voila, 54 bricks. I did have to ensure that they were the right size, which I did make a mistake on, before I started cutting. I embraced this mistake though, and preferred the design with the gaps between the bricks, rather than a solid tower. I also believe that this has given the tower some stability – this is very much needed as there is nothing holding it together! Sanding it down took a while, but I enjoyed having each brick and each sanded surface to be very individual because of this.
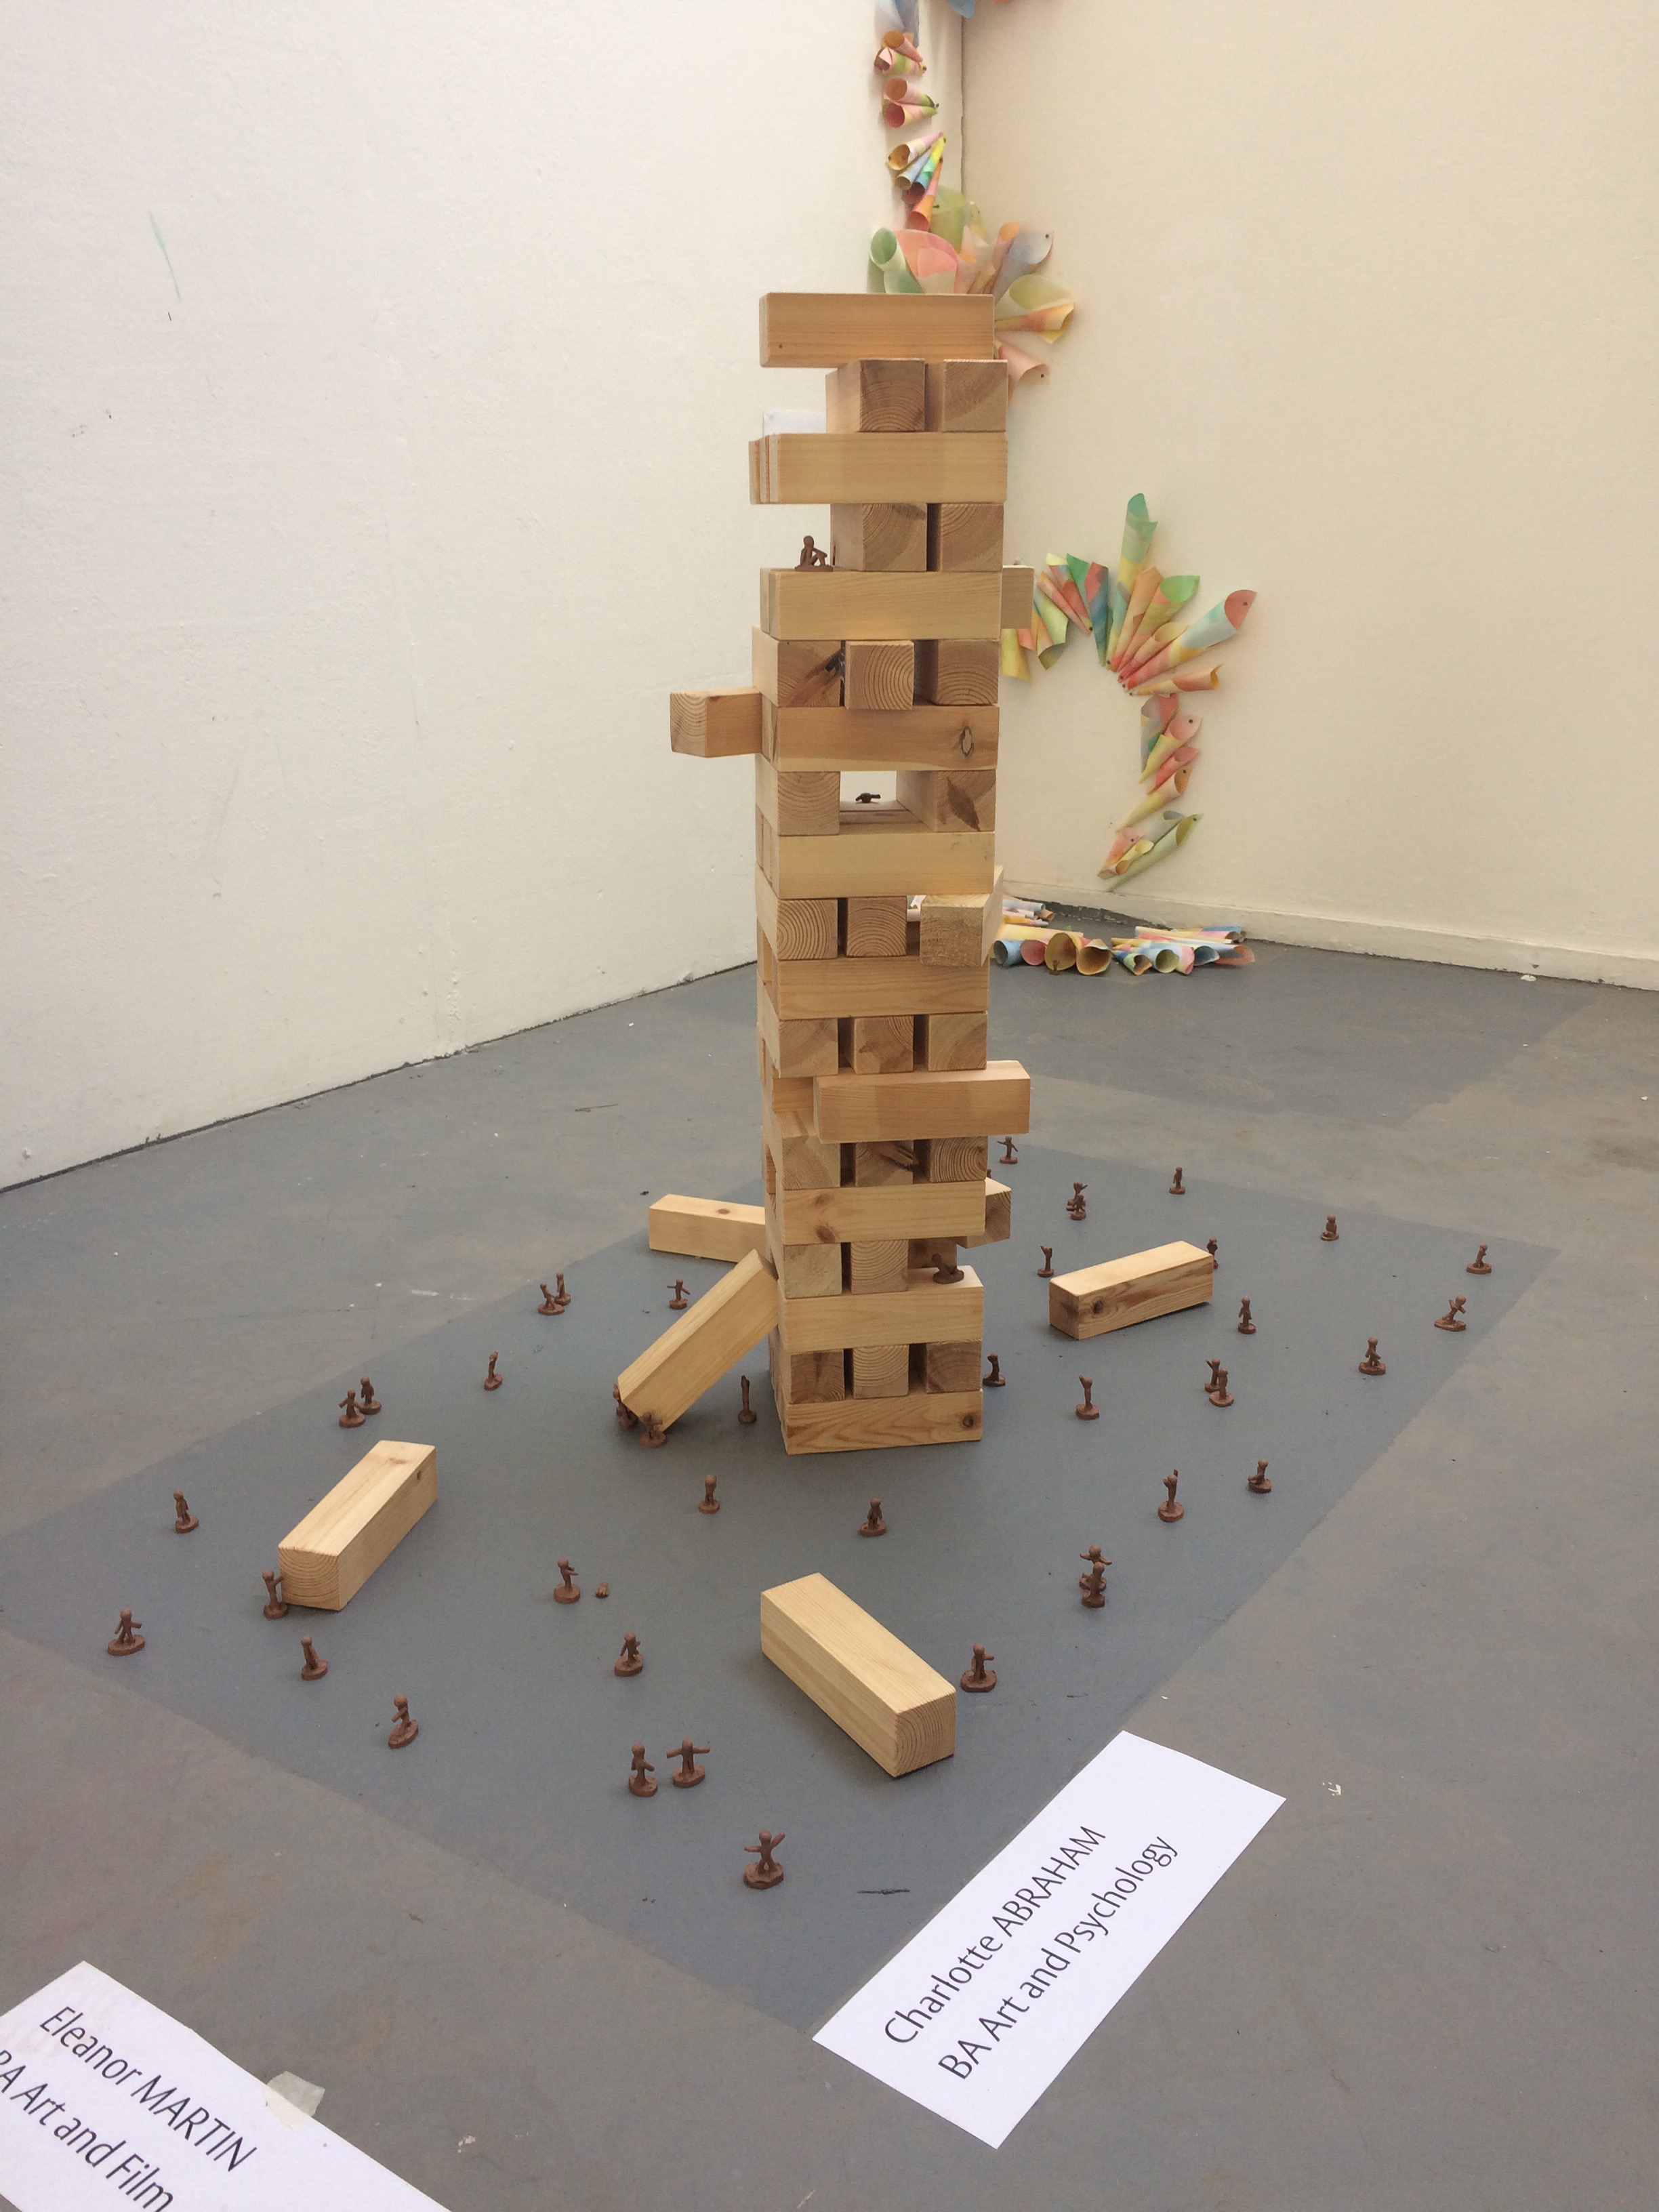
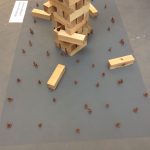
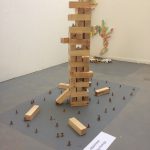
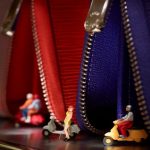
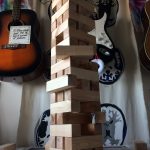
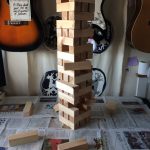
Displaying it was a tough choice, however I am overall happy with the design on the floor. This makes the piece interactive, which is one of the basic ideas behind the piece, and reverts me back to my childhood, which is a key concept behind the sculpture. Any other way of displaying would have ‘given off the wrong message’ so to speak, and would not have portrayed what I want it to.
If I had done this project again, or even this sculpture again, I don’t think I would have changed any part of my idea. This is because through the failures that have occurred, I have grown my piece and my idea, and I am very happy with the final piece.
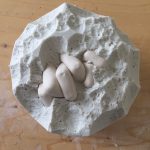
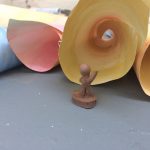
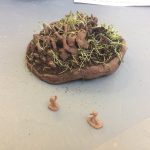
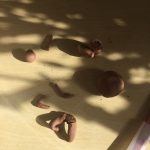
Photos below include the final set up of the sculpture and the small people interacting with three other sculptures around near my sculpture.

Making an impossible sculpture

An Impossible Sculpture was our first introduction to this project, whereupon I came up with several ideas. To do with making the impossible sculpture, we were briefed that we should make a section of the sculpture idea. I wanted to make a miniature of one of my ideas, as I thought that would be more exciting to make and engaging for the viewer. Following through with this thought, I wanted to have the chance to look at the board game ideas that Jasmine and I came up with together.
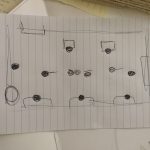
After talking to Jasmine about the idea that she was looking into, and asking her if it was acceptable to use our idea, and to recreate it in a miniature sculpture. She said yes, and so I started to plan the idea in a scale drawing.
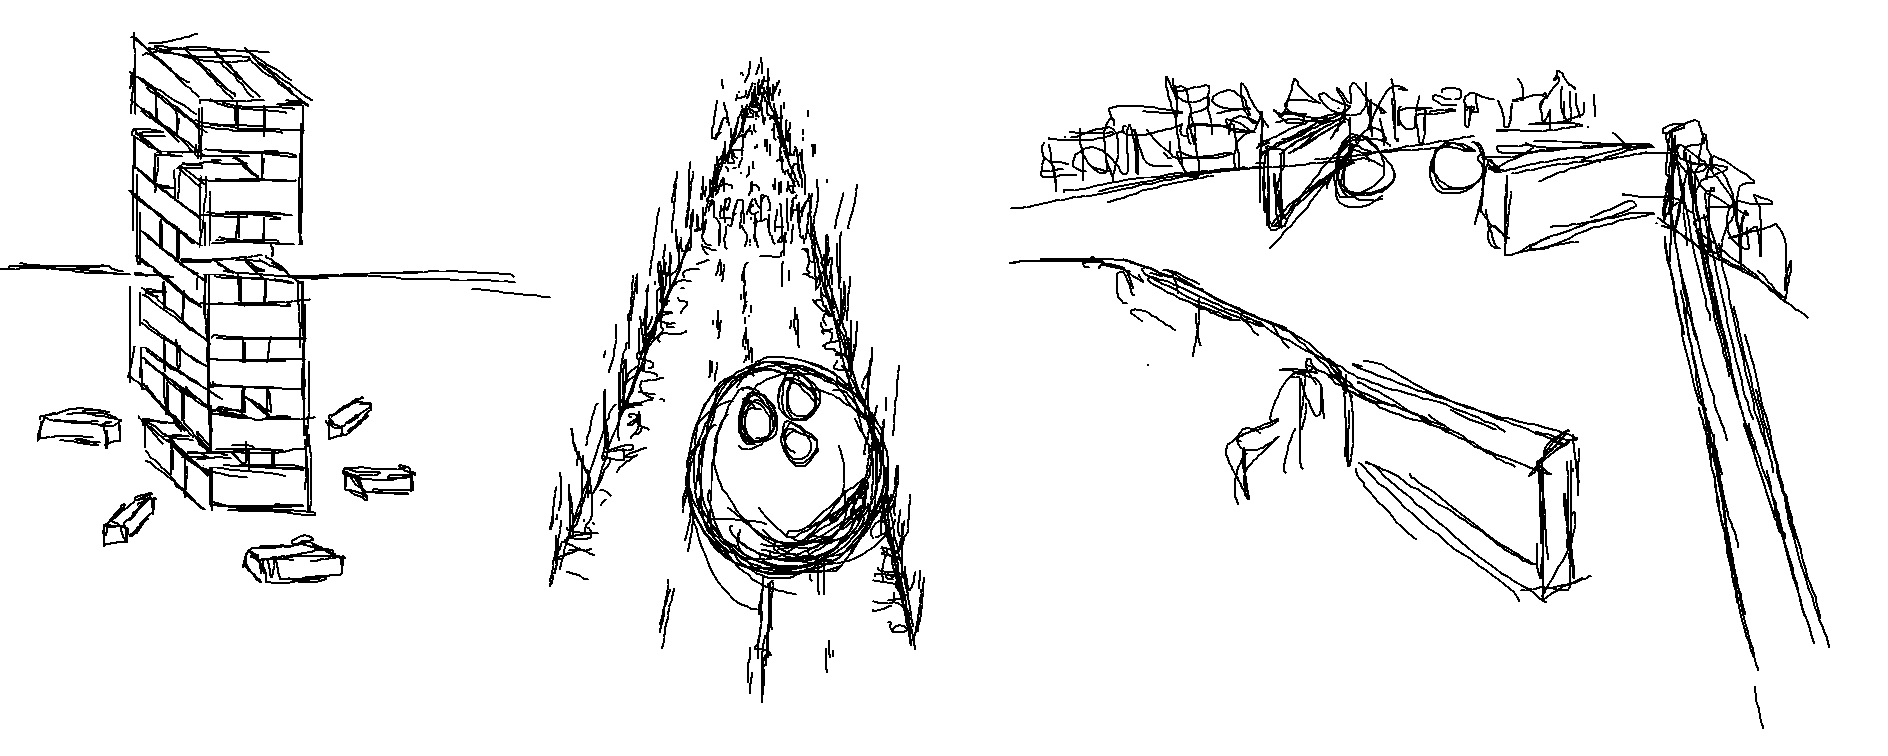
I had a look at all three designs that we had thought of, and I feel like any three of these designs (Jenga/Pinball/Bowling), would have been suitable to continue on within this project, however I wanted to create a scale version. Looking at the designs closer, I felt as though the Jenga tower and figures were the most suitable as a scale design (even though I am sure I will create the other two at some other point to create a three piece set), and went on further planning my ideas for this.

The artists that I have been inspired by includes that of Jake and Dino’s Chapman and their piece of Chapman’s Hell. This piece is incredibly detailed, with many elements adding up to intricate scenes. I would like for my sculpture to be this intricate, although maybe with not as many people, blood and gore. Coupled with the intricacy, I would like for the small people that I make to be around the size of the figurines that Nic Joly creates using wire, paper and clay. These are highly detailed small figurines, and I wish to recreate this level of detail. I am unsure yet as to whether the figurines that I am going to make are going to be painted or leave as clay sculptures, but wish to explore this further later on.
As a child, I remember fondly playing with Lego, and wanting to play with small train sets. Looking at these further, they are often to scale, such like I wish my sculpture to be. Mini Models looks further into this, and has inspired me to look at the surroundings of the sculpture, and whether I want to look into adding extra decoration (which I will look into later on). Small People Films has also allowed me to see how small figures can interact with their environment compared to ‘normal’ or ‘every day’ sized figures and objects. I have found by looking at many films, depending on the scale of the figures and surroundings, can impact the level of detail and realism that the figures can contain. So can my figures be very simple? Non-realistic? Simply shapes? Or do I have to be highly detailed as small figures this size can be?
Other artists that I have looked at include;
- William Kass, a photographer who uses food and miniature figures to create scenes on the viewpoint of the miniature figures. This would have been a really interesting prospect to play with the food, as it was part of one of my other ideas for the sculpture. However, I enjoyed the thought of the traditional games being impossible more than food scenes.
- Vincent Bousserez, a photographer who often uses the body and plastic miniature figures to create unique scenes. I loved the unique use of the body and particularly the piece where a small figure uses a lawnmower to shave a beard. I wish to use this uniqueness in my own work.
- Christopher Boffoli is a fine artist and photographer who creates fine scenes with every day foods. These are not as detailed as the work of William Kass, as there are only plain backgrounds. Once again, I love the creativity of the scenes with the food, and the simplicity of the detail that each scene contains. There is not a large amount happening in each scene, but the figures that are in the scenes, and the foods that are used, are highly detailed and placed with caution. I wish to use this simple detail in my sculpture piece.
- Kurt Moses and his wife takes photos of miniature people in everyday settings. These have a high sense of realism about them, because they have been taken with a fish-eye lens, and in humans natural environments such as cities, towns, and beaches. I wish to have the realism that these pieces have which includes the use of the wider world.
- Matthew Albanese is a fine art photographer who shoots landscapes from a tabletop in his studio. His intricate landscapes are made of mostly everyday items that are found in the home and garden. I looked at Matthew Albanese as I am unsure whether I want to expand the pieces to the surroundings such as trees, roads and other daily environments. (I go into detail about this later on) If I wish to do so, I would feel as though I would use same, or similar materials to Matthew Albanese in order to create a surrounding environment for my sculpture to sit in.
- Slinkachu is another artist who uses an external environment. Unlike Kurt Moses and his wife, Slinkachu often uses preexisting forms that are already in the environment, such as a broken pillar or a bag of rubbish left on the side of the road. This has made me consider whether I could exhibit in environments such as this, or take the piece around to different environments and have a photography series along side. This, however, would imply that it is supposed to be this small, but my intentions are for a scaled version. I still wish to play around with different environments and displays.
- Diana Armfield RA uses many mediums, including that of pencil drawings. These pencil drawings are left in a rough state after many layers of lines have been added, in order to create shapes and scenes. I wish to play around with this style of roughness when using the clay, and in the final display of my piece.
- Donald Hamilton Fraser RA uses a soft, complimentary colour palette to paint seascapes. These blues, yellows, whites, and deep greens, are colours that I wish to explore when looking at painting the miniature figurines. I chose the colour palette of this artist, as I wanted to create that same soft use of block colours, even when the scene in its entirety is going to very full and giving a sense of panic. I also wish to see how the colour palette will change the views of the piece, and whether adding more red, for example, will make people think that there is more death in the piece.
- I enjoyed looking at the work of Henry Walsh as I wanted to discover whether the figures in his painting are ‘normal’ sized people simply painted small, or whether they are small figures that are painted their true size. This question is raised as there is either little or no reference to the size of the figures that are painted. I also want to try and explore this question within my work, and possibly look at photographing the figures in order to gain this perspective. I also want to have a play around with the darker colour palette that Henry Walsh explores, with the contrasting bright white background. The main inspiration from this work showever, is the anonymity of each individual within the piece, even though they come together to create a community, and therefore must have character.
- Anita Mandl creates smooth, simplified sculptures of animal forms, including that of a polar bear, penguins and elephants. Each sculpture has no faults or sharp edges to it, and adds to the smooth surface that they indivudually have. I enjoy seeing how each sculpture is detailed enough to identify the animal, however simple enough that it isn’t an overload of information. I wish to play around with having a smooth surface for each of the small figures I intend to create, and whether this still allows them to be anoymous, and yet still have individual character.
- Heather Cassils works with large (generally 2000 pound/~900 kg) block of clay, beating them in a series of kicks and blows. The result of the performance is a lump of clay that has been manipulated in new ways. Each piece is indivudual and unique to that performance. The evidence looks soft, due to the way it has been handled, and the waves that seem to appear in the clay, and yet indestructable, because of the sheer size and weight of the object. I wish to play around with the roughness that Heather leaves the clay in, and contrast it against the soft and smoothness of Anita Mandl’s work and the way in which she produces her sculptures.
- Antony Gormley created a series of small terracotta figurines that filled the floor of a large room. Once again, each of these figures is somewhat impersonal, however you soon start building a connection with each one due to the way in which they all stare at you in one giant wave. Each time you look at the pieces, you spot something new. I also enjoy the sheer scale of the number of figurines that are in one space. I wish to explore the number of figurines that I would need for my sculpture, including a room full, to a handful.
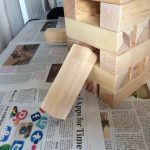
- Aurelien Froment looks at Jenga blocks of varying sizes, and allows people to delve into a wooden box in the corner of the room, and make their own structures. I would love for people to participate with my Jenga tower in this way, and yet at the same time, the tower and the clay figures are very delicate, and I do not wish these harm. I have therefore decided to leave the tower half played, as though people are in the middle of playing Jenga, just as Aurelien Froment’s piece is half played at the end of the night.
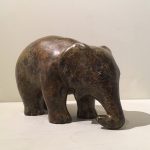
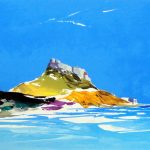
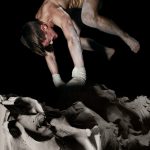

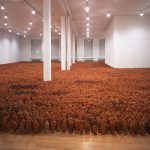
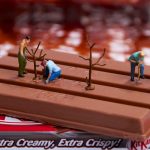


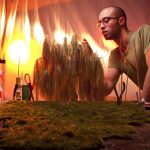


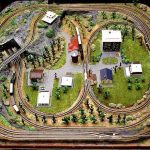

Above: a selection of images representing the variety of inspirations for this project. See relevant posts for more images.
Little People
There was a lot of work and preparation into what the miniature figures were going to look like, what materials they were made out of, and the colours that they might be painted. Overall, this was a long process, even when the ‘final design’ of the figures were chosen.
For the little people, I decided to explore different mediums that which I could make them in, that the artists I have been inspired by, have also explored.
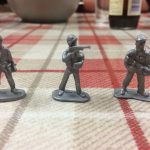
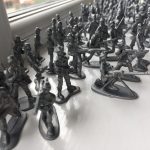
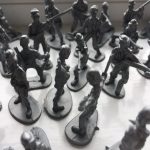
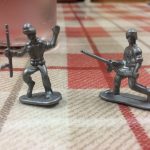
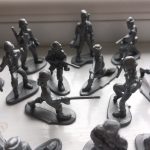
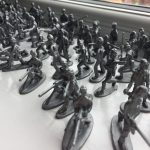
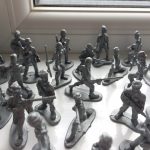
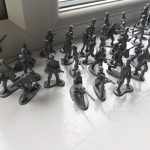
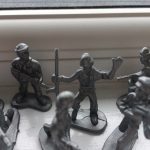
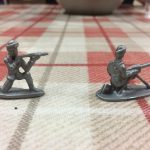
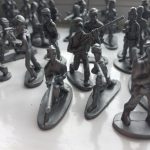
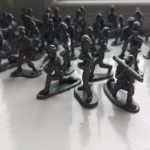
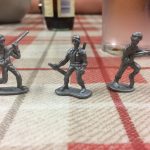
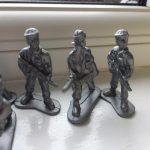
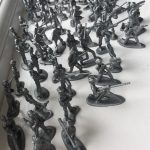
I firstly looked at toy soldiers, but quickly found that the positions that they were in, and the accessories of guns and hats, was not the environment that I wanted to create. There was not an easy way that I could determine to reshape them, and so decided to look into making the figures myself.

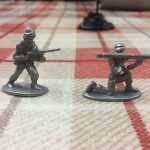

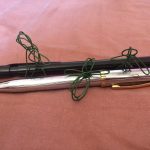
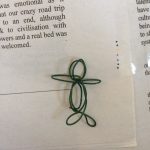
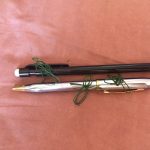
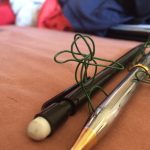
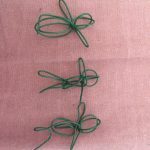
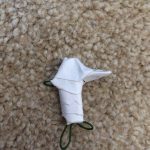
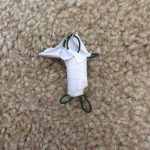
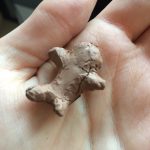
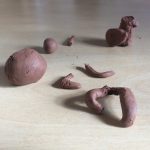
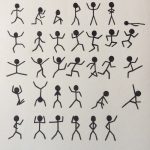
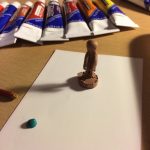
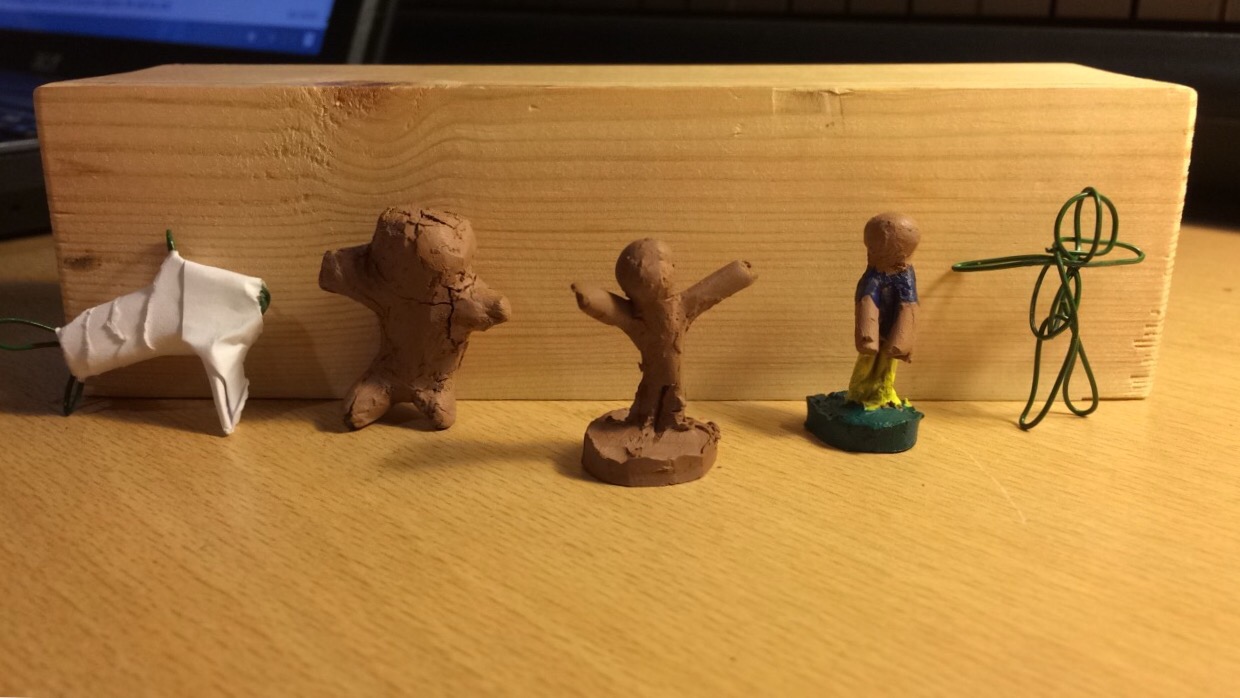
When making the people, I first decided to look at wire. Using floral wire, which is generally very thin and malleable, I was able to create some small figures, however if one mistake was made for the proportions, then there was enough wire in order to create the legs, and to connect legs from an extra piece of wire was not worth that extra wire. Not only were the legs a problem, but there was no way in which they were able to stand up (hence the pen and the pencil in the photos). This was wire out of the window.
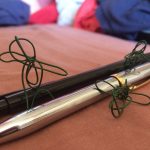
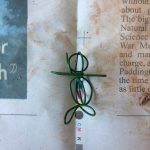
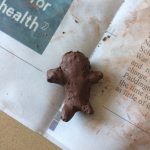
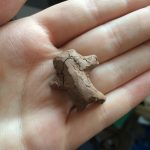
I know I just said that wire was out of the window, however I decided to give it a chance when mixing it with paper and clay. What mistakes these were. Both the clay and the paper were hard to manipulate around the wire, and both additions made the figure loose its shape very quickly. There was no easy way of attaching the paper to the wire, or to sculpt it around the finer areas, such as the head of the figure. The clay looked okay, apart from creating an overweight character that could not stand up. However, once the clay dried, there were large cracks, and thus was deemed improbable material for the miniature figures.
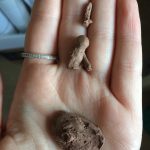
This led me to the use of clay only for the miniature figures. I did not think that this was going to work, however after a quick play around and following a tutorial on how to make a clay figure (mine unfortunately broke before I managed to take any photos) – www.youtube.com/clayfigure – I felt like I was getting the hand of things. Now I had to choose the size, and also how difficult I wanted to make my job. Because I was doing the sculpture at 1:50 scale, I decided to search up the average human height (~180cm according to WorldData), and divide by 50 = 3.6cm. I felt that this was too talk, especially considering that toy soldiers are around 3cm, and when placed near the bricks, seemed a better size.
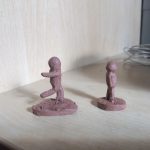

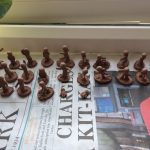

I made around 50 people in order to get a ‘crowd’ sensation, and to get lots of different personalities and styles within the piece. I decided to keep them quite plain with no accessories such as hair and clothing, as this would make the pieces seem ‘out of the norm’ and carving would make the clay very weak. The lack of facial expressions with the mix of individually made, does give them their own personalities in the environment. I enjoy this aspect, as there are no two the same, such as humans in society, and I sometimes feel as though I can pick out the figure that I feel most like (at that point in time that is).
Colour was also an important aspect to chose upon, including what colour palette to use and also whether the people should be painted, or not. I decided to use a similar colour palette to Donald Hamilton Fraser RA. These colours included;
- Blues: Ocean Horizon, Blue Wash, Blue Prism, Blue Bottle, High Altitude, White Lightning, Droplet, Morning Jewel, Lunar Landscape
- Yellows, oranges, reds: Garnet Symphony, Deep cream, Banana Dream, Moroccan Sands, Ripe Mango,Golden Nugget
- Greens: Lime Zest, Deep Forest, Green Slate Path, Moss Green
- Browns: Char Latte, A Seat at the Globe, Buccaneer, Chocolate Cream Pie, Deep Autumn, Nutmeg Dust
- Purples: Heather Bloom,
- Whites: Quartz Grey, Indian White
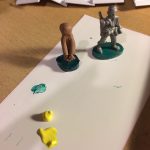
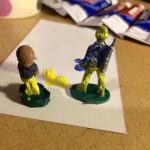

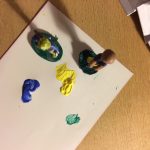
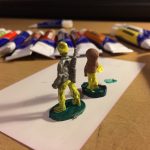
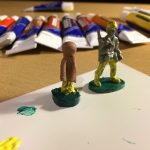
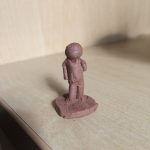
I decided to not paint the rest of the figures as the paint was much harder to apply than anticipated. It was hard to apply (for example, I could not get underneath the arms in the little person I painted), the clay soaked up the paint, and it was incredibly patchy and overall looked horrible. There was also the challenge of hair and accessories, that I ummed and ahhed about, and which would take even longer than necessary to complete on each figure. Adding colour to all of the figures would also distract the viewer of the piece from the simplicity of the sculpture, and what it ultimately represents. I mentioned earlier that I feel like I could sometimes pick out the figure that I am at that particular moment, and that they are all individual with personalities. I feel that adding colour to all of them would make this too obvious, and people would not get the meaning of the small figures, but just marvel at the detail of them.
Jenga
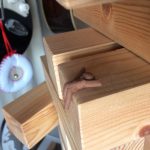
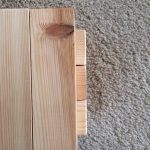
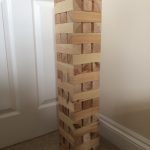
For the Jenga part of the sculpture, I decided that I wanted to cut wood, such as the traditional Jenga game. There are 54 pieces all together, in 18 layers, inspired by the giant, and normal table-top Jenga games. We had 2×2″ wood that was available to use, and found that if three pieces were placed next to each other, this would be the same as 15cm. I then cut the wood as 15cm long each, so then the tower would sit square. Once the pieces were cut, I saw that there was a difference between the length of the pieces, and the width of three of them placed together. Oops. Instead of pondering on this, I decided to sand down the edges of the pieces, not only to sand away the rough parts and splinters, but also to create a rounded edge on each of the pieces. This, for me, created a more professional look, such as the original Jenga game, and makes the pieces themselves look flowing.
The misjudgement of the sizes did take me by surprise, as the wood that was cut, was not in fact 2×2″. This did make me a little annoyed, however I pieced the whole tower together with spaces in between the three pieces in each layer, and felt as though this has worked better than a solid tower would have done.
To see how I pieced the Jenga tower together for the final sculpture, see Displaying an impossible sculpture.


There are a couple of expansions that I could do with this sculpture. First of all, I could add decorations such as trees, roads and houses, in order to create a full landscape. This has been inspired by many of the artists as they also work with the larger landscape. However, I soon realised that this would not only be too much work, but this would have also taken away the detail of intricacy of the clay people and the Jenga tower. As the piece is all about the relationship between these two, I did not want to take the viewer away from this intricacy.
There is also the expansion of different games, that were originally thought of alongside the Jenga tower. This includes a pinball game and a bowling alley through streets. Once again, I feel like I would have enjoyed making these, however there is a lack of time and I also feel that more than one impossible game sculpture, would detract the attention from the original Jenga tower and clay figurines.
But, how did it go?
Artist Statement
The main concepts behind my sculpture are impossibility and childhood. As we grow older, we often forget about small things, and regress to childhood when such objects are presented in adulthood. In a world where we are forced to grow up, why should we not be able to play with childhood toys? My sculpture is a part of these questions; childhood and impossibility.
My work presents a three foot tall wooden Jenga tower, partially played, surrounded by a large crowd of miniature clay figures. The processes used included cutting, moulding and sanding. I was initially inspired by the work of Nic Joly, and his pieces Why Not? (Joly, 2015), and London Calling (Joly, 2017). These are highly detailed pieces depicting a story between giant and miniature, through the use of miniature clay figures. From this, I began to experiment with clay, wire, and paper to create miniature figures. This led me to the work of Antony Gormley, Field (Gormley, 1991), a room filled with small handmade terracotta figures. This inspired me to create a large number of clay figures for the sculpture. Gulliver’s Travels, a 1726 book (Swift, 1726), and a 2010 film (Gulliver’s Travels, 2010), and The Borrowers (The Borrowers, 1997), further informed me of ways in which miniature figures interact with their larger environment, and connected me back to my childhood.
In my own work, I wanted a significant size difference between the figures and Jenga tower. This surrounds the theme of impossibility as the sculpture is a 1:50 replica of a playable Jenga tower, the blocks inspired by Debuilding, Aurelien Froment (Froment, 2001). This would be impossible to play at the larger size, as the pieces would be difficult to move, and a hazard if played too high. The inspiration came from Claes Oldenburg, and his vision to create impossible sculptures, including bowling balls down Fifth Avenue (Oldenburg, n.d.). Through the use of giant versus tiny, I want the viewer to interact with the piece, to bend down, to view it closely, and to think about smaller things in life.
In addition, I wanted each figure to be plain and inanimate with minimal detail, showing we are all the same in society. However, each figure is handmade, and gives the sense of individual personalities, and connection to a community, all with the same fear of the impeding fall of the Jenga tower. A lack of identity with a contrast of large personalities comes from the inspiration of Antony Gormely, Field (Gormley, 1991), and Anita Mandl, with her simplified animal forms Young Elephant (Mandl, n.d.), and Little Blue Penguin (Mandl, n.d.). Not only do these miniature figures interact with the Jenga tower, but also of those pieces displayed around, and allows the viewer to interact closer these.
My piece presents ideas about the illusion of impossibility and the connection to childhood through the contrast of size and displaying on the floor. The sculpture depicts a giant, half played wooden Jenga tower, surrounded by miniature clay figurines. The contrast between the size of the blocks, tower and figures distinguishes the impossibility of the project in a real size. Displaying on the floor regresses the viewer to childhood.Blog: https://charlotteabrahamart.wordpress.com/
Froment, A., 2001. Debuilding. [Art].
Gormley, A., 1991. Field. [Art] (Tate Liverpool).
Gulliver’s Travels. 2010. [Film] Directed by Rob Letterman. Ireland: Davis Entertainment; RatPac-Dune Entertainment.
Joly, N., 2015. Why Not?. [Art] (Castle Galleries).
Joly, N., 2017. London Calling. [Art] (Castle Galleries).
Mandl, A., n.d. Little Blue Penguin. [Art] (Curwen Gallery).
Mandl, A., n.d. Young Elephant. [Art] (Curwen Gallery).
Oldenburg, C., n.d. Untitled. [Art] (Frieze).
Swift, J., 1726. Gulliver’s Travels. 1 ed. s.l.:s.n.
The Borrowers. 1997. [Film] Directed by Peter Hewitt. United Kingdom: Working Title Films.